War in the Woods Game 4: Hielan' Laddies

"I'll never be one of those wargames bloggers that neglects the blog for months at a time, especially in the middle of a campaign series."
- me, April 2023
Well, we saw how that worked out. Instead of boring you with the reasons for my absence, I'm going to just get on with the next entry in our French and Indian War campaign using Sharp Practice. I'll save the excuses for a hobby post somewhere down the road. I haven't been wholly unproductive, but very scatterbrained.
Phineas Kirk, a militiaman in Scroggins' Provisional Company of Militia, slouched against his firelock and spat in the ashy mud at his feet. Much of the soil around Stag's End was sopping like this now, drenched by the company's futile attempts to extinguish the blazes set by the rampaging French and Huron.
Several other men of the company were gathered around him to herald the arrival of the regulars dispatched at the order of Lord Loudoun. Already, they could hear the tramp of feet and, most distinctly, the beat of drums and skirling of bagpipes.
In a few moments, the disheveled colonial volunteers were greeted by the sight of about two-dozen highland infantry in bright red coats and plaid kilts. They marched in sharp but not hurried time to the jaunty tune beat out by the company's drummer and wailed by its piper.
The colonists straightened at the sight. The Scots were armed to the teeth, with well-kept muskets and gleaming bayonets fixed, but also an assortment of broadswords, dirks, tomahawks, and pistols. Even the drummer and piper had silver flintlock pistols tucked into their plaid.
At their head, an officer, his broadsword held at attention and his blue bonnet worn at a jaunty angle. As he passed, the lieutenant nodded imperiously to the militiamen, who straightened up and tried to comport themselves in as military of a manner as they were able.
In just a few more minutes, the highland warriors were out of sight down the road, but the marching tune stuck in the head of Kirk and his fellow men as they lit out to join their bookish commander in the ongoing campaign against the raiders from New France.
---
When last we left our campaign, bitter fighting had reduced much of the frontier settlement of Little Eden to ashes, although neither side could claim a conclusive victory. Meanwhile, on the eastern side of the valley, a lightning blow by a large Franco-Huron force failed to capture valuable hostages at Stag's Head, but still forced the disorganized militia troops out of the settlement and put it to the torch.
Unable to immediately reinforce the ragged defenders of Little Eden, the Anglo-American leaders throw their reinforcements toward the eastern valley. A detachment of Scottish highlanders under Lieutenant Hector Sinclair quickmarch from the ford at Hawley's Hope to the front lines, linking up with militia troops under Ichabod Scroggins, who took light casualties in the fighting at Stag's Head but have lost several men to desertion after the defeat. Little Crow's Mohawk warriors continue to stand with their European allies.
With no reason to hang around the razed settlement, the French colonial troops and Huron warriors under Capitaine Adrien Grenier and sachems Le Voyant and Captain Samuel have withdrawn to cold camps in the woods north of Stag's Head. Their scouts are able to detect the approach of the British, and Grenier decides to test the mettle of the British regulars. He sets out to create a fight on his terms.
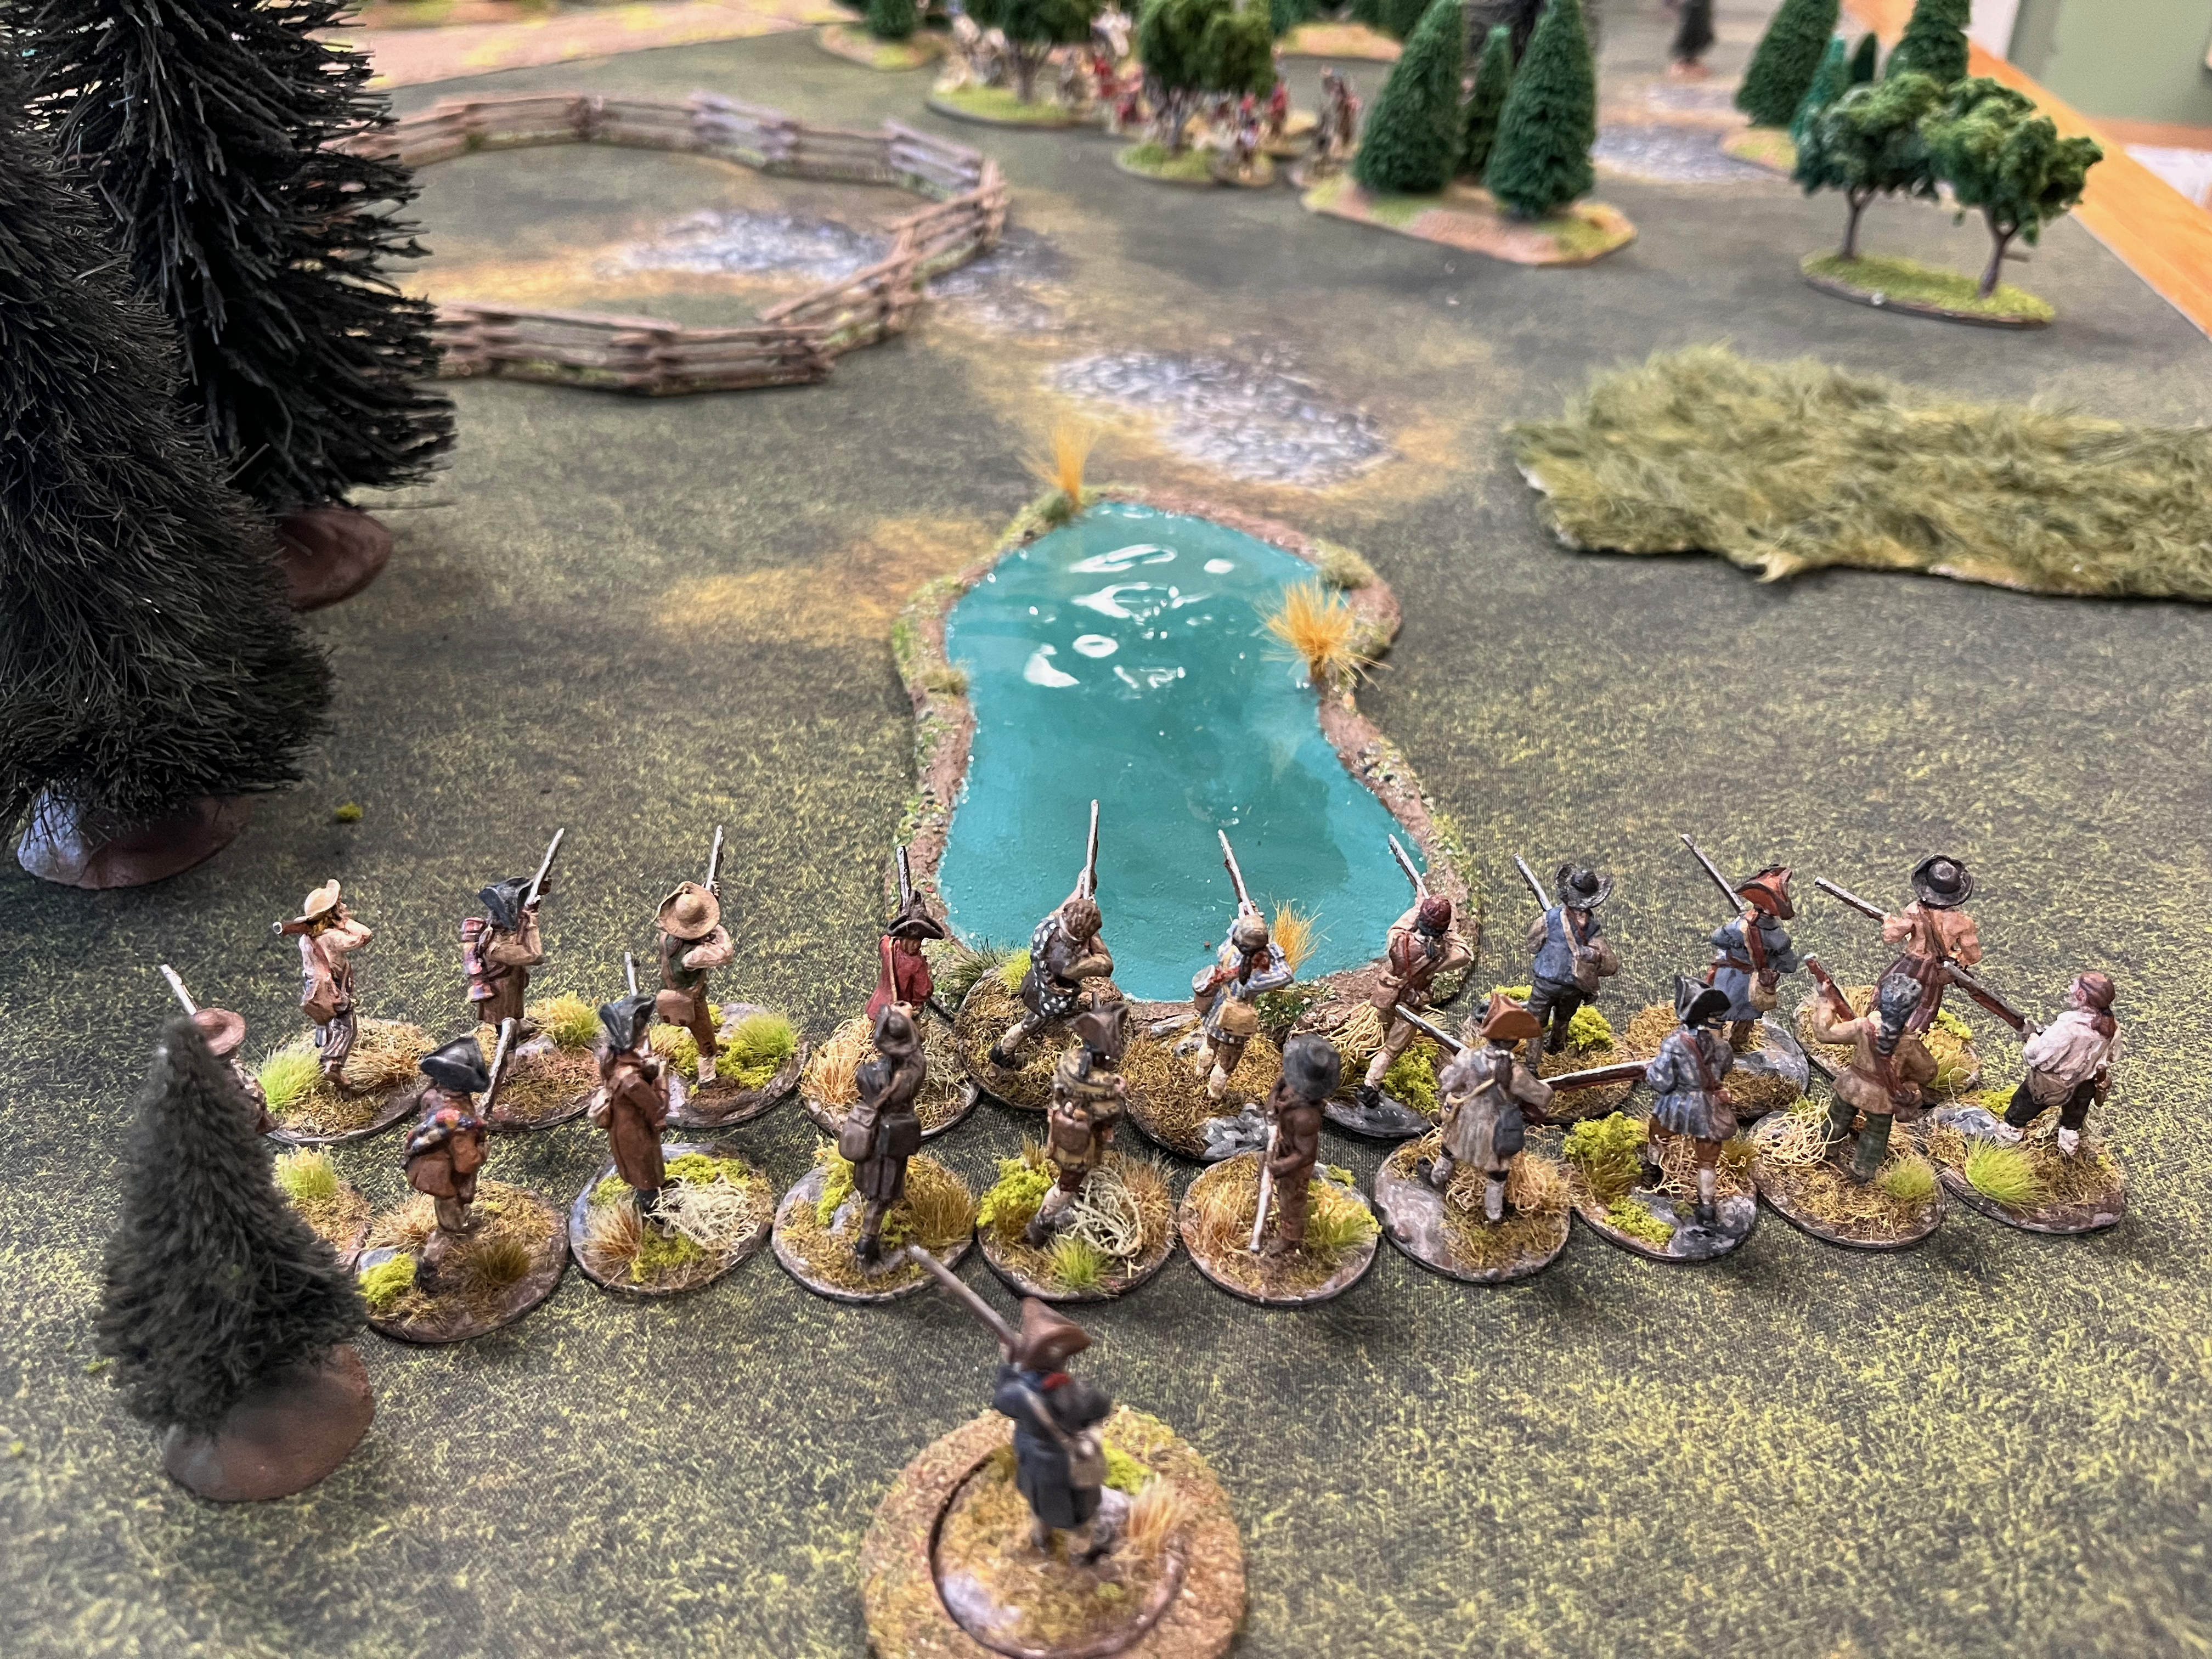
The battle is eventually joined near a torched farmstead on the outskirts of what was once Stag's Head. The barrels mark some of the deployment points, either fixed or moveable.


The French deployment points stick to the wooded area, while the British will enter either where the road meets the table edge or at the charred farmhouse.

The French and Huron, disregarding line formations in favor of mobile bands of skirmishers, have the advantage in picking where they chose to engage their enemy, so it's little surprise to see them skulking among the trees, lying in wait for the British forces. First enters a large band of warriors under Captain Samuel, and then Grenier's colonial light infantry behind them. This represents a decent portion of the raiding force in the region.


It doesn't take long for the sound of marching feet to resolve in the appearance of a large force of Anglo-American soldiers on the main road. At Lt. Sinclair's directions, the Mohawk scouts advance the moveable deployment point, hoping to screen the arrival of both the highland line and the militia.


However, Sinclair hasn't been in North America long, and he has a few things to learn about the realities of frontier warfare. His scouts have ventured too close to the foreboding woodline and been driven off by the arrival of Huron skirmishers under the shaman Le Voyant, who deploys from the French moveable deployment point. Their presence in proximity to the British moveable deployment point will keep their enemy from being able to safely use it, meaning the Mohawk will have to join the battle elsewhere.


Having at least momentarily negated the British skirmishers, Grenier's light infantry advance toward the wood's edge, hoping to scout out the British regulars.

Captain Samuel's group quickly joins them. More than a dozen Huron take up positions in the cover of the pines and underbrush. At least a few of them fought at the Monongahela, where they ambushed and slaughtered Braddock's redcoats. Will they be able to repeat that success today?

Aware of the close presence of their foes, but not their exact location, Little Crow's small group of Mohawk skirmishers deploy on the left side of the British advance.

The Mohawk can't catch a break, however, as the young warrior and his comrades find themselves in the sights of a group of French colonial light infantry under the dramatically named Sgt. Ironskull. Although they're firing at long range, the soldiers under the grizzled frontier warrior are skilled shots.


The Mohawk fighters are in the open, but drop swiftly to the ground to avoid the worst of the volley. They still suffer three points of shock from the opening fusilade.

Scroggins, reacting to the shooting, leads his men to the right flank of the advance, near the burnt cabin. He's feeling particularly authoritative after successfully rescuing his daughter Charity from the clutches of the Huron warriors. However, his increased command initiative is dampened some by a random event that leaves his militia moving sluggishly. Maybe they realize that he did very little to effect his girl's rescue, and that his bumbling may have cost them Stag's Head as a whole.

With the element of surprise at least partially lost, Grenier and his men eagerly move up to the edge of the woods. To their captain's dismay, however, they're too far away to effectively fire at the highlanders, who have reacted quickly by adjusting their facing and marching into the trees on their right. What the kilted warriors lack in subtlety they seem to make up for in discipline.


Grenier orders Captain Samuel's Huron to join them, forming a formidable firing line at the wood's edge. Le Voyant's skirmishers back up Ironskull's light infantry.


The seer orders his warriors to fire at the hapless Mohawk, who suffer three more points of shock, but, perhaps miraculously, no casualties. It's enough to see them turn and flee on their activation, though.


Unfortunately, in his fervor, Le Voyant has managed to step in front of one of his own men's firelocks, and is hurt in the confusion. The random event reduces his command level, meaning he's unlikely to be able to efffectively command his troops in the coming fight.

At the command "Left- face!" the highlanders smartly turn into line facing the enemy. However, their muskets are likely to have little effect on the enemy at this range, and they bide their time. One or the other of the foes will have to leave the treeline at some point to make the most of their smoothbore weapons, but the French are hardly inclined to leave their defensible positions.

Or maybe they are. Ironskull orders his skirmishers to step forward and fire at the highlanders at extreme range. Despite their skill, the firing has no effect on the Scots.

The colonial militia trundle through the underbrush in a poor imitation of the drilled regulars in front of them.

The main body of raiders under Grenier and Samuel stay put, content to let things develop and commit themselves when the need arises.

Little Crow does his best to steady his retreating Mohawks, but he simply doesn't have the command presence of a revered war leader like Hardheart.

The militia are getting along a little quicker now, swinging to the right. But there's no room to outflank the foe, so at some point Scroggins will have to order them forward into the teeth of the French defense if he hopes to make any difference.

Sinclair raises his broadsword to indicate the flashes of fire from the French and Huron skirmishers in the trees and orders his highlanders to fire, right away. The Scots crash off an uncontrolled volley, but at this range, and with their targets in loose formation behind tree cover, the fire has no effect.

The highlander's volley is forceful enough to kick up a pall of smoke in front of them, which obscures the battlefield. The random events have been frequent so far this game, and none have really benefitted either side.
The smoke protects the Scots from return fire from the French and Huron, who only manage to inflict one shock in the long-range gunfight.


Sinclair's men don't stand their ground, however. They form up and move further to the British right, trekking behind the burned cabin.

This brings them just barely within sight of Samuel's Huron, who fire off a volley at long range, inflicting two shock on the highlanders, which is effectively doubled because they are struck from the flank. Grenier, sensing a chance to do some damage to the highlanders, orders his men and Samuel's to continue firing, and their next volley kills two of the highland infantry.


Scroggins' militia finally wheels into line facing the Huron.

While the highlanders take cover behind the fenced yard of the ruined farmhouse. Sinclair rallies his men, removing some of their shock.

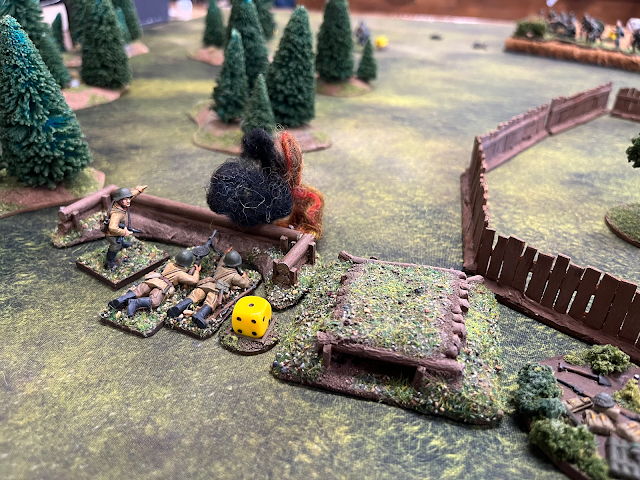
With the field in front of his men cleared of enemies, the French sergeant Ironskull leads his light infantry forward. He has a mind to finish off the shocked Mohawks and threaten the British deployment point on the road.


Little Crow hasn't been idle, however. He's spent the last several turns calming his warriors, and now he turns to face the French and defend his allies' flank.

Sinclair has his men present arms and deliver an orderly volley toward the raiders in the trees. The effect, two shock on the French light infantry, is minimal, but it's the first luck the highlanders have really had.


Samuel's men return fire, but have no effect on the highlanders, who seem to have regained some of their footing. They snap off a second volley in quick succession and manage to bring down one Frenchman and a Huron warrior (although I don't seem to have gotten a photo of it).

On the other flank, Le Voyant seems to have gotten up the energy to order his men forward despite his embarrassing wound suffered earlier in the battle. The French light infantry under Ironskull have definitely understood their commander's instructions, advancing swiftly into the woods to threaten the Mohawk.


Finally, the militia make themselves known, firing a volley at the Huron in the woods. The fire isn't particularly deadly, but twenty-odd musket balls whistling through the air tend to have a convincing effect even if they don't strike you. The warriors take four shock.


Unfazed by the increasing volume of fire directed at his men, Grenier pulls shock from his colonial troops and has them fire at the highlanders. Despite having a marksman in the mix, they only manage to put a shock on the Scots.


Despite the threat of the light infantry rushing them, Little Crow takes his Mohawk toward the highlanders, guarding their flank. It means Ironskull has driven a wedge in the British line, cutting them off from their point of withdrawal, but he's also pretty far from support.

The firefight that has developed on the French left flank is at long range, and the two groups exchange volleys without having too much effect on the battle as a whole - for now.

In the midst of the swirling gunfight, Little Crow orders his Mohawks to turn and fire. Instead of targeting the French trailing them, they draw a bead on Le Voyant's skirmishers in the road near the unused British moveable deployment point.

A Mohawk marksman carefully aims and fires, picking off the Huron seer. Le Voyant is thrown to the ground by the force of the lead ball catching him low in the ribs. The wounding and subsequent slaying of Le Voyant has had an effect on French Force Morale, but they're still in the fight.

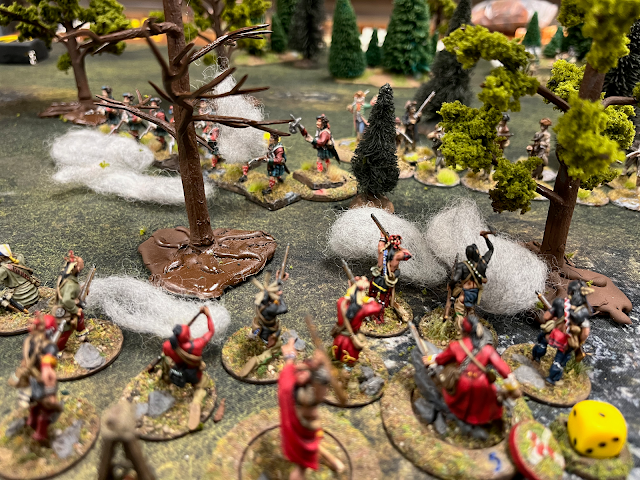
In fact, Ironskull intends to see Little Crow pay for this. The French appear out of the trees alarmingly close to the British-allied natives and fire at point-blank range, killing one warrior.

In the next turn, they get the jump on the Huron and continue their attack. They fire again, inflicting two shock, killing another man, and wounding Little Crow himself. They follow up the fusillade with a charge, inflicting another shock on the hapless Mohawks by hurling tomahawks before them.
The Mohawk evade the charge, fleeing with a bloody nose inflicted by the French colonial troops. Little Crow's wounding pulls British Force Morale down some, but the morale situation isn't critical.


While this has been happening on the British left flank, the firefight between the Anglo-American line troops and the Franco-Huron skirmishers has been largely inconclusive. The weight of British fire has managed to kill one of Grenier's men, and weakened Captain Samuel's group with shock and a few casualties.


Despite the number of muskets the British have thrown into this fight, any commander knows that sometimes it's a single gun that makes a difference. In this case, that weapon is in the hands of a French marksman in Grenier's light infantry group. He surveys the highland line from his crouched position behind a log that's pocked from the impact of musket balls and picks out the officer waving his sword at one end of the line. He raises his musket, draws a bead on the lieutenant, and carefully squeezes the trigger, holding his breath.

Lieutenant Sinclair has been shouting himself hoarse trying to exhort his highlanders, who are well-drilled but have only arrived in the new world recently, to fire and load. He lifts his broadsword high in his left hand to punctuate his last order, and the Frenchman's musket ball punches a hole in his red jacket about two inches below the armpit. Shot through the heart, Sinclair is senseless by the time he hits the dirt, and dead moments later.

The shock of Sinclair's death drops British Force Morale two points, to seven. The impact is likely more felt in the loss of command and control ability than in morale.
A junior officer from the ranks of the highlanders steps up, but he orders a withdrawal. The highlanders fall back in good order into the woods, taking their fallen leader's body with them.

Grenier takes advantage of the momentary lull caused by the highlanders' retreat to pull his French and Huron troops back into the woods. They lick their wounds and check their ammunition. Scroggins, seeking to cover the withdrawal of his highland allies, surges forward in an attempt to fill the gap in the line. In his haste, the two units of militia in the formation break their coherency.


Despite the loss of their lieutenant, the highlanders are still a fit fighting force, and they're more than capable of threatening the Frenchmen under Ironskull sneaking around their rear.

Ironskull hasn't survived through so many battles by acting foolishly, and he knows his skirmishers have no chance against two units of highlanders in a stand-up fight. They fall back swiftly to the road before the orderly advance of the highlanders can reach them, picking up Le Voyant's leaderless skirmishers along the way before beating it back into the woods to regroup with Grenier, who has successfully evaded the pursuit of the militiamen.


The French have no ground objectives to hold here and are content to withdraw, having inflicted some casualties on their foe and given the newly arrived highland regulars a bloody nose.
---
Despite the dramatic loss of the highland lieutenant, the day's fighting has been fairly even. The Huron are about as happy to lose Le Voyant as the Scots are to lose Sinclair, although Sinclair was a higher level leader.
Additional casualties were two French light infantry and three Huron warriors for the French and three highlanders and two Mohawk skirmishers for the British. The militia got through the fight unscathed, but also contributed fairly little.
I think this battle really demonstrated the difficulty of using line forces against skirmishers in Sharp Practice, particularly if the skirmishers have good cover, such as the thick North American woods. The battle location ended up being a bit of a trap for the British, especially with Little Crow's failure to serve as the force's scouts. I seem to remember I suggested bringing at least some of the highlanders in skirmish order, but my opponent wanted the "oomfh" of the two-unit line.
Speaking with the benefit of hindsight, I think I as the French player should have held my fire and tried to hit the enemy line troops closer to the edge of the woods, or draw them into the close confines of the woods and pick them apart in detail. The long-range firefight slightly favored my skirmish troops, but it wasn't effective for either side.
My armchair general advice to my opponent would have been to get aggressive with the highlanders, advancing to close range to fire their first volley before charging. None of my units would have stood up well to that, so long as the highlanders could survive long enough to get into range for the charge.
This battle also fed our perception that force morale matters very little in Sharp Practice. It doesn't seem to be a very effective way to wear down your enemy, at least when the enemy are skirmishers. Maybe we're wrong about that.
So, the fighting in the valley swirls on. The British have a technical victory here, but little to show for it. Orders are passed to find a replacement leader for the highland force, and Anglo-American troops positioned near the ford at Hawley's Hope advance into the wilderness in search of the raiders, who still seem to command the initiative.
Stay tuned, folks.
Comments
Post a Comment