War in the Woods Game 1: The Price of Pork - 28mm French and Indian War Sharp Practice
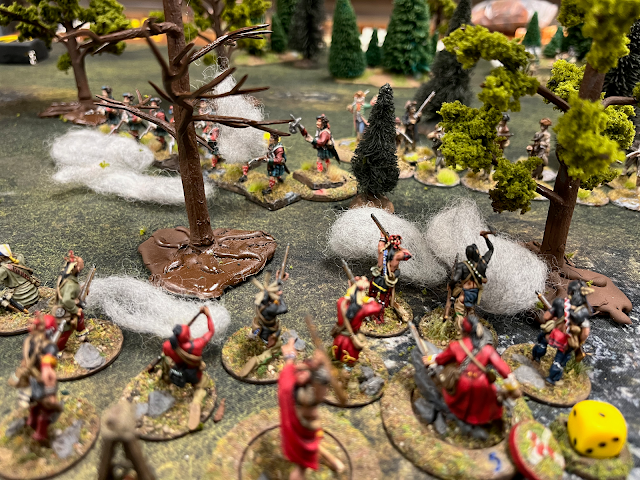
In the predawn light, shadowy figures move from tree to tree, cradling their firelocks against their bodies to keep them free of underbrush and vine. Some wear capotes and blue wool forage caps, others are stripped to the waist and adorned with fierce red and black war paint.
Marius watches the men under his charge from the rear of the file, while the imposing blanket-draped Huron war chief at his shoulder has his eyes on the French officer. Balancing the hot tempers of the political dissidents that gathered in Parisian cafés kept Marius at his wit's end, but working with the crown's native allies had proved an even worse headache.
"We go now." Hardheart growls in French, a language he knows only a little better than Marius knows Wendat. What the sachem lacks in vocabulary he makes up for in tone. The words are a statement of fact, not a question.
The young exile nods agreement, adjusting his forage cap and checking the pan of his musket before the two leaders steal through the trees toward the enemy settlement.
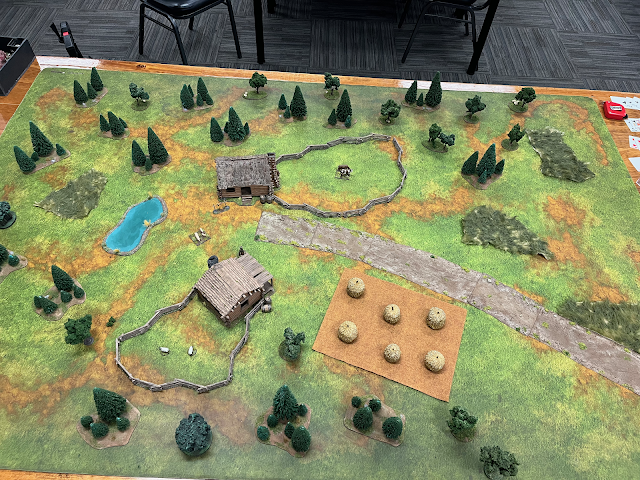
In June of 1757, the farming settlement of Little Eden marks the furthest extent of English control in the isolated Hemlock River Valley of the sprawling New York territory, with scattered French outposts to the north leading off into New France.
While neither George nor Louis have heard of this little hamlet or its so-called mayor Jeremiah Reddin, it is here that the first sparks of war in the valley will be struck.
A brief note on these campaign battle reports: I will try to include notes where there's a game mechanic that needs explaining, but these are meant to be narrative, not instructional. This first report will include a few explanations of how Sharp Practice works, but after this, those will be fewer and far between.
The task assigned to the Frenchmen and Huron under Enseigne Marius Dujardin's command is not an unusual one— reconnoiter the frontier settlement and raid the English colonists' livestock — but it is a fateful one.
All seems quiet as the small raiding party makes their way through the trees, quiet in moccasin-clad feet.
Something appears to have given the raiding party away, however, and the colonists spring to action, grabbing their muskets and hurrying to the defense of the settlement.
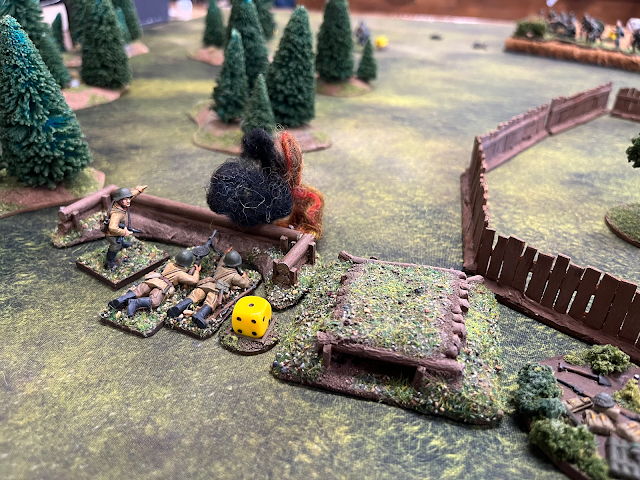
"Mayor" Reddin and his compatriots take cover behind one of the bark-roofed cabins, trying to get a glimpse of the foe.
The colonists are able to deploy close to the middle of the table because they are skirmish troops, defenders get an additional deployment distance, and troops deployed out of line of sight of enemy troops also gain additional deployment distance.
Another group of colonial roughnecks under "Leatherback" Randy hustle over the fence into the cow pen, eager for the fight. A local rabble-rouser, Randy's claim to fame is his near inhuman resistance to the elements. He scorns the shirtsleeves of polite folk and drapes a blanket over his shoulders on only the bitterest of winter days.
Special cards in the Sharp Practice deck, referred to as Command Cards or "flags," allow for unique or additional activation, or deployment of units whose card was not pulled before the turn ending or "Tiffin" card has been pulled. Each side has pulled one Command Card so far in this turn.
Dujardin and his crack colonial light infantry quietly slip into the sheep pen on the other side of the hamlet, out of sight of the wary colonials.
A group of troops can seize and escort or carry off a group of livestock if they're able to make base-to-base contact, but they will not be able to move quickly — with 3d6 — while doing so. That means line troops won't be able to move at the double and skirmish troops won't get their free skirmish movement action.
Three more Command Cards are drawn, one British and two French, but no units have moved — deployment doesn't count — or fired yet in this turn, so there is no random event.
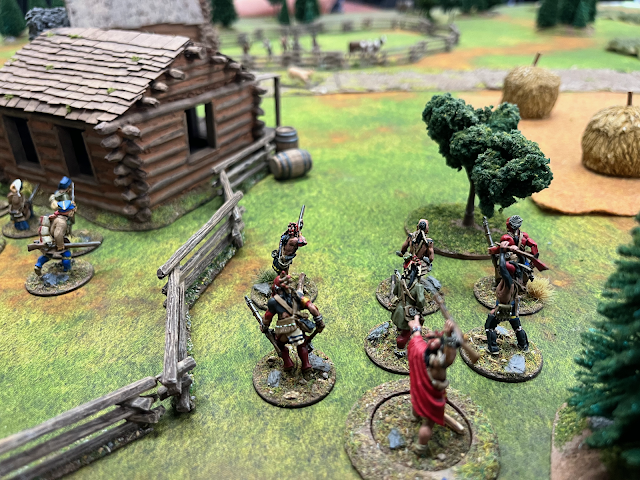
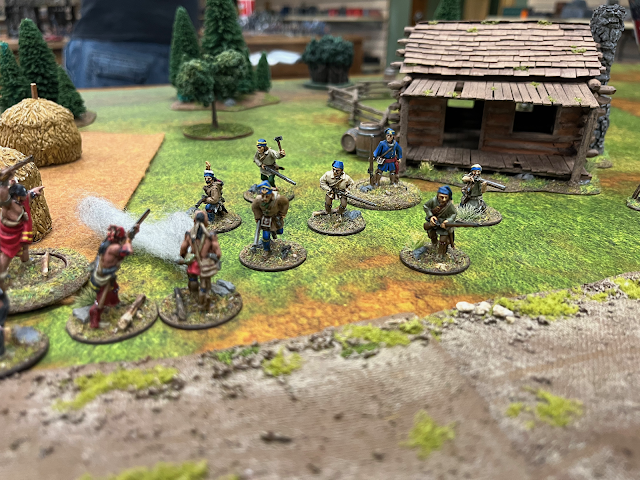
The French's native allies also arrive, making themselves known. This group of warriors under War Coat deploys at the edge of the forest and take shots at Randy's men behind the fence.
The musket-armed Huron are firing at close range — 12 inches or less — so will hit on a d6 roll of 4 or greater. Their leader, War Coat, plays one of the French's accumulated Command Cards to give the group an additional shot, bringing them to 8 shots in total.
Two of the shots strike true, and one colonial skirmisher is felled. First blood goes to the Huron under War Coat.
The next card drawn heralds the arrival of the last unit in the raiding party, the Huron skirmishers under the sachem Hardheart. Although Dujardin might be leading the expedition on French orders, the brutal and experienced Huron sachem holds more sway than the exiled Parisian dissident when the lead begins to fly.
Hardheart orders his men to fire at Randy's group as well, also spending a Command Card to add an additional shot.
The colonists sought cover after the first Huron volley, and none of the natives' fire proves lethal. However, the sudden fusillade inflicts two points of shock on the militia.
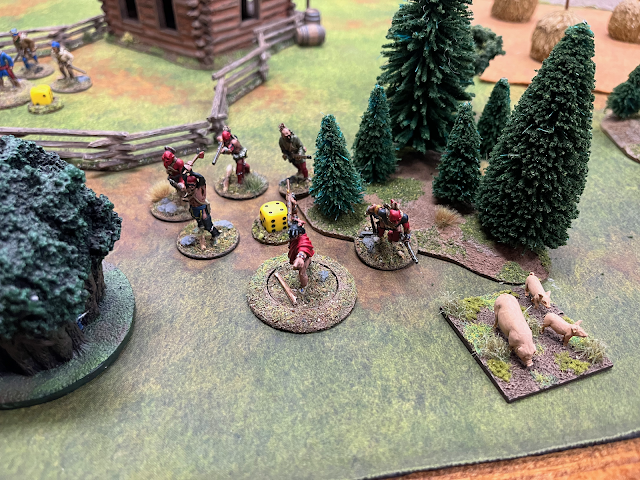
The next card drawn is the Tiffin, which ends the current turn. The pigs of Little Eden, less docile than the other livestock, will wander freely at the end of each turn if not in the control of a group. This is determined by a dice roll.
In this case, the pigs trundle along the farm fence, trying to get out of the way of all this hot lead that's suddenly flying through the air.
The next turn sees Reddin's card pulled first. He tries to bring his men around the corner of the cabin and form a firing line, but the colonists are hesitant and so their leader elects to move back out of sight.
Three Command Cards, two French and one British, are drawn, and then the Tiffin again.
After a Tiffin is drawn but before the next turn begins, players may use one Command Card to activate a unit — but not the leader — that was not activated during the turn. The players take turns doing this, if they wish, starting with the player that has the most Command Cards when the Tiffin is drawn.
That's what lets Hardheart's warriors emerge from the woods and take cover behind the baled hay to fire again at Randy's colonists. Because they've moved and fired, they don't have the actions needed to reload during this activation.
The fire isn't wasted, however, and another of Randy's roughnecks is cut down. They also take another point of shock.
That's enough to convince Randy, headstrong though he may be, that it's time to find a new position. His hide may be tough enough to withstand the biting New England frost, but it's unlikely to be able to repel musket balls. This is another Command Card activation.
As their foes flee out of sight, War Coat's warriors hop the rail fence and take hold of the sheep. One man leads his prize on a rope while another scoops the wooly creature up under an arm, ready to make off.
The pigs root their way under the rail fence and flee further from the musket fire. Their roaming makes them much more difficult for the French and Huron to snatch, even if the raid is going their way thus far.
At the top of turn three, Dujardin's light infantry try to get into the fight, but find their movement hindered by the rail fence and disappointing movement rolls.
Fortunately, Hardheart's men do not suffer from the same trepidation. Experienced skirmishers, they quickly advance through the hayfield and reload their pieces, getting off another volley toward Randy's retreating skirmishers.
Hardheart is a Level II leader, unlike the other leaders in this skirmish, and so he uses his second Command Initiative to lend another shot to their volley. It has the same effect as playing a Command Card to add an additional shooting die.
Only one of the native skirmishers finds his mark, but the man that does has singled out the shirtless leader of the group. A musket ball clips Randy's bare bicep, wounding him and reducing his leadership level from Level I to Level Zero. The painful but nonfatal wound has greatly reduced his ability to command his remaining troops.
As a result, British Force Morale falls one point, from 9 to 8.
A French Command Card is drawn, and then the Tiffin, ending another brief turn. The British have been getting disappointing card draws.
War Coat's men, having drawn English blood and captured their share of the colonists' livestock, are content to line the fence and wait for any response from their foes. They do this on a post-Tiffin Command Card activation.
It was lost in the confusion of battle, but the pigs at this point trundled back toward the French side.
The next turn begins with each side drawing a Command Card, and then Randy's card is drawn. He uses one of the Command Cards to increase his leader level back to Level I, allowing him to retreat into the cover of the woodline with his skirmishers and pull one shock. The surviving colonists take some comfort in the shelter of the sturdy pines.
The next card out is the Tiffin again, and the Huron under Hardheart use a Command Card to rush out from their position in the hay field to grab the pigs before they can run off again. This they successfully do. They're exposed here, but the English have so far only cowered behind the settlement's log buildings or retreated under fire.
The start of the next turn brings a Command Card for each side and then the untimely arrival of more frontier skirmishers under Jim Morgan, an opportunistic fur trader and a veteran of King George's War some 10 years before. His men, catching the Huron in the open, let loose a volley with Morgan adding an additional shot using a Command Card for good measure.
War Coat's men drop to the ground at the last moment and avoid taking casualties from the sudden return fire, but they suffer two points of shock from the ordeal.
A French Command Card is drawn, and two flags are used to immediately activate War Coat's skirmishers, although his card has not yet been drawn.
They beat a hasty retreat, their muskets still unloaded from their earlier volley. In this scenario, any time a unit of troops tries to convince the surly pigs to move, the animals have a chance to break free and head off in a random direction. In this case they do just that, escaping their Huron captors and trotting off toward Morgan's men as the colonists prime their pieces.
Dujardin's troops hop the fence and come up to support. With the arrival of some real English resistance, the raiders need to grab what they can and escape before the colonists get their act together. Few Frenchmen — least of all Dujardin — are willing to die for some livestock, so there's little chance that this skirmish will turn into a pitched battle.
A French Command Card is drawn.
Encouraged by the arrival of Morgan's men, Reddin orders his skirmishers to form up behind the cowpen fence and unleash a volley at Hardheart's retreating natives. There is one marksman, a support option that is selected and assigned to a unit before the game starts, among the colonists, and he takes careful aim and fires.
The sharpshooter's round knocks one of the marauding warriors off his feet, never to rise again, while the shooting of the other skirmishers inflicts two points of shock on the unit, which is doubled because they are firing at the Huron's exposed rear.
Fortunately for the Huron, Hardheart's card comes out next, and he spends a Command Card to bump his leader level up to Level III. Each command level allows a leader to pull two points of shock, so he spends his activation exhorting his skirmishers to show bravery in the face of the cowardly Englishmen.
The warriors are steadied, their shock reduced to nothing, but they are still unloaded and have their backs to the foe.
Randy's card is pulled, but his wound prevents him from commanding his men. The next card is the Tiffin.
Startled by the fresh cracks of musketry, the squealing swine race into the hayfield, passing by the Huron and giving the raiders another shot at carrying them off.
Morgan's men again open the turn, calmly firing another volley at the Huron's rear from the shelter of the trees. Irregular skirmishers like these get a bonus for firing at long range, so long as they are in cover, and they're making the most of it.
The Huron raiders take four more points of shock from the volley, but fortunately Hardheart's card comes out next.
The aging sachem orders his skirmishers to reload quickly, his calm demeanor under fire reassuring the younger warriors. The leader pulls two shock from them and has them move to grab the passing pigs, which they successfully do, before herding them off, back toward the woodline.
At this point, the French and Huron have possession of two of the three groups of livestock that are this scenario's objectives.
However, three flags are pulled, resulting in a random event. In the flurry of activity, Hardheart has managed to sprain his ankle, meaning that his men will move more slowly, with a -1 to each die of movement rolled.
Randy uses a card to increase his leader level on his activation and pull the remaining shock from his group.
Following Hardheart's lead, the Huron under War Coat leave the sheep pen and retreat into the woods. Dujardin may be able to communicate with his allied warriors, but he does not seem to command their respect on the battlefield. They're leaving him to skirmish with the English while they make off with the spoils.
Three more Command Cards are drawn, one British and two French, but the random event has no effect on War Coat's skirmish troops.
At this very moment, Dujardin's skirmishers are advancing up to the cowpen. They've been activated using four French Command Cards, allowing them to act immediately, and if their leader's card comes up normally later, they will get to activate again. Their intent is to snatch those cows and be off quicker than the colonists can bring their muskets to bear.
But it's not to be. As they move up, the Tiffin is drawn and the turn ends. Reddin's men use a Command Card to activate after the Tiffin, and draw a bead on the raiders from New France.
Their marksman is still carefully reloading, patching his round ball in the barrel for the best accuracy, but the other men manage to inflict a point of shock on the advancing Frenchmen.

Reddin's skirmishers have their blood up now, and manage to get the first activation of the next turn. They pour more fire into the French, but the elite light infantrymen make the best use of the fence's cover and only suffer two additional points of shock.
Now, the French get a chance to shoot back. The shock limits their effectiveness, but the marksman assigned to the unit, Remi, manages to cut down the English sharpshooter in Reddin's unit from across the cowpen.
Two more British flags come next, and Randy uses one of them to steel his resolve and command his skirmishers back to the fence, where they take shots at the French interlopers.
Despite the presence of a marksman in Randy's group as well, their fire is hurried and has no effect on the French.
The turn ends, and Hardheart's warriors use a Command Card to move further into the woods, keeping hold of the unruly pigs.
Morgan's skirmishers advance and, finding the Huron out of range, fire at the French troops, killing one of them.
With two of the three groups of livestock in their possession, Dujardin's light infantry break contact and take cover behind the cabin across the road.
The Anglo-British skirmishers reload their pieces and hop the fence in pursuit of the raiders.
But the Frenchmen are swift and leap the fence out of sight, using four flags to activate a second time in the same turn.
The French and their native allies are now fully in retreat, making off with the colonist's livestock. But as Hardheart's men move through the underbrush, guiding the pigs, Jim Morgan's men snap to action and give them a parting volley.
The Huron are caught on the move by the fusilade, and while none are killed, they do take two shock, and the pigs get loose as they move. The natives don't intend to stick around to wrangle the pigs while under fire.
The colonists aren't giving up just yet. Reddin and Morgan's groups both fire at the retreating foe. As the balls whizz past Dujardin's men, they flinch and utter breathless prayers. No one seems to have been hit.
But as they move, Dujardin feels spreading warmth under his arm. He reaches down and gasps in pain as he feels the bloody wound in his side, realizing he's been hit.
The French are briefly thrown into disorder by the flurry of lead from the colonists. Command breaks down and each man sets out to save his own skin. The light infantry scatter into the brush and out of sight, but in the confusion they don't notice that their officer has been struck by a second musket ball.
Dujardin tumbles into a patch of tall grass where he lies motionless.
Despite the loss of their leader, though, the raiders from New France have made good their escape. The French and their allies have captured the majority of Little Eden's livestock, eking out a minor victory in the scenario.
---
Even in victory, the raiders are disconcerted by the British resistance, which was hardier than any of them anticipated. The French are angered that their leader Dujardin has been slain by the enemy, and over some dirty swine. The Huron, especially the younger warriors, are not content with their limited role in the raid and are eager to take the fight to the colonists. And the bellicose and bitter Hardheart is more than willing to oblige them.
Casualties have been relatively light – Dujardin, one French soldier, one Huron warrior, and three militiamen killed and Randy wounded – but the raid was particularly fierce compared to others. In part, this was because of the rapid colonial response.
I hope you enjoyed the first installment of War in the Woods. You can find the next entry here.






Awesome writeup! I had forgotten about that first sniper duel in the pig pen. Looking forward to more.
ReplyDeleteI love campaigns for TFL games, they make the individual battles so much better. I'm eagerly looking forward to further installments!
ReplyDelete