Winter Storm Breakthrough - CoC Battle Report

Got in a game this Friday, and this time we returned to the Eastern Front for a game of Chain of Command. This battle saw German pioneers trying to push through a Soviet defense line and capture a Soviet company command post during Operation Winter Storm - the push to relieve Stalingrad in December 1942.
We used the German Infantry Pioneer platoon and the Soviet Motorized Brigade rifle platoon from the TFL 2016 Christmas Special. The scenario was Attack on An Objective from the core rulebook. I had the Soviets, my opponent the Germans.
 |
| Table overview - this table is probably too thickly forested for the area south of Stalingrad, but we have nice new winter trees and wanted to use them |
 |
| View from the Soviet table edge. The objective is the thatched house near the crossroads. |
The Germans rolled a Force Morale of nine, and the Soviets got 10. The Germans rolled three free patrol moves, which let them make a little progress, but didn't let them leap forward like they might have hoped. My patrol markers started on the objective house, which helped.
 |
| End of the patrol phase |
I made sure to throw out my patrol markers as pickets to halt the German advance, and kept them from getting JOPs in the woods on my right flank or in the log cabin near the crossroads.
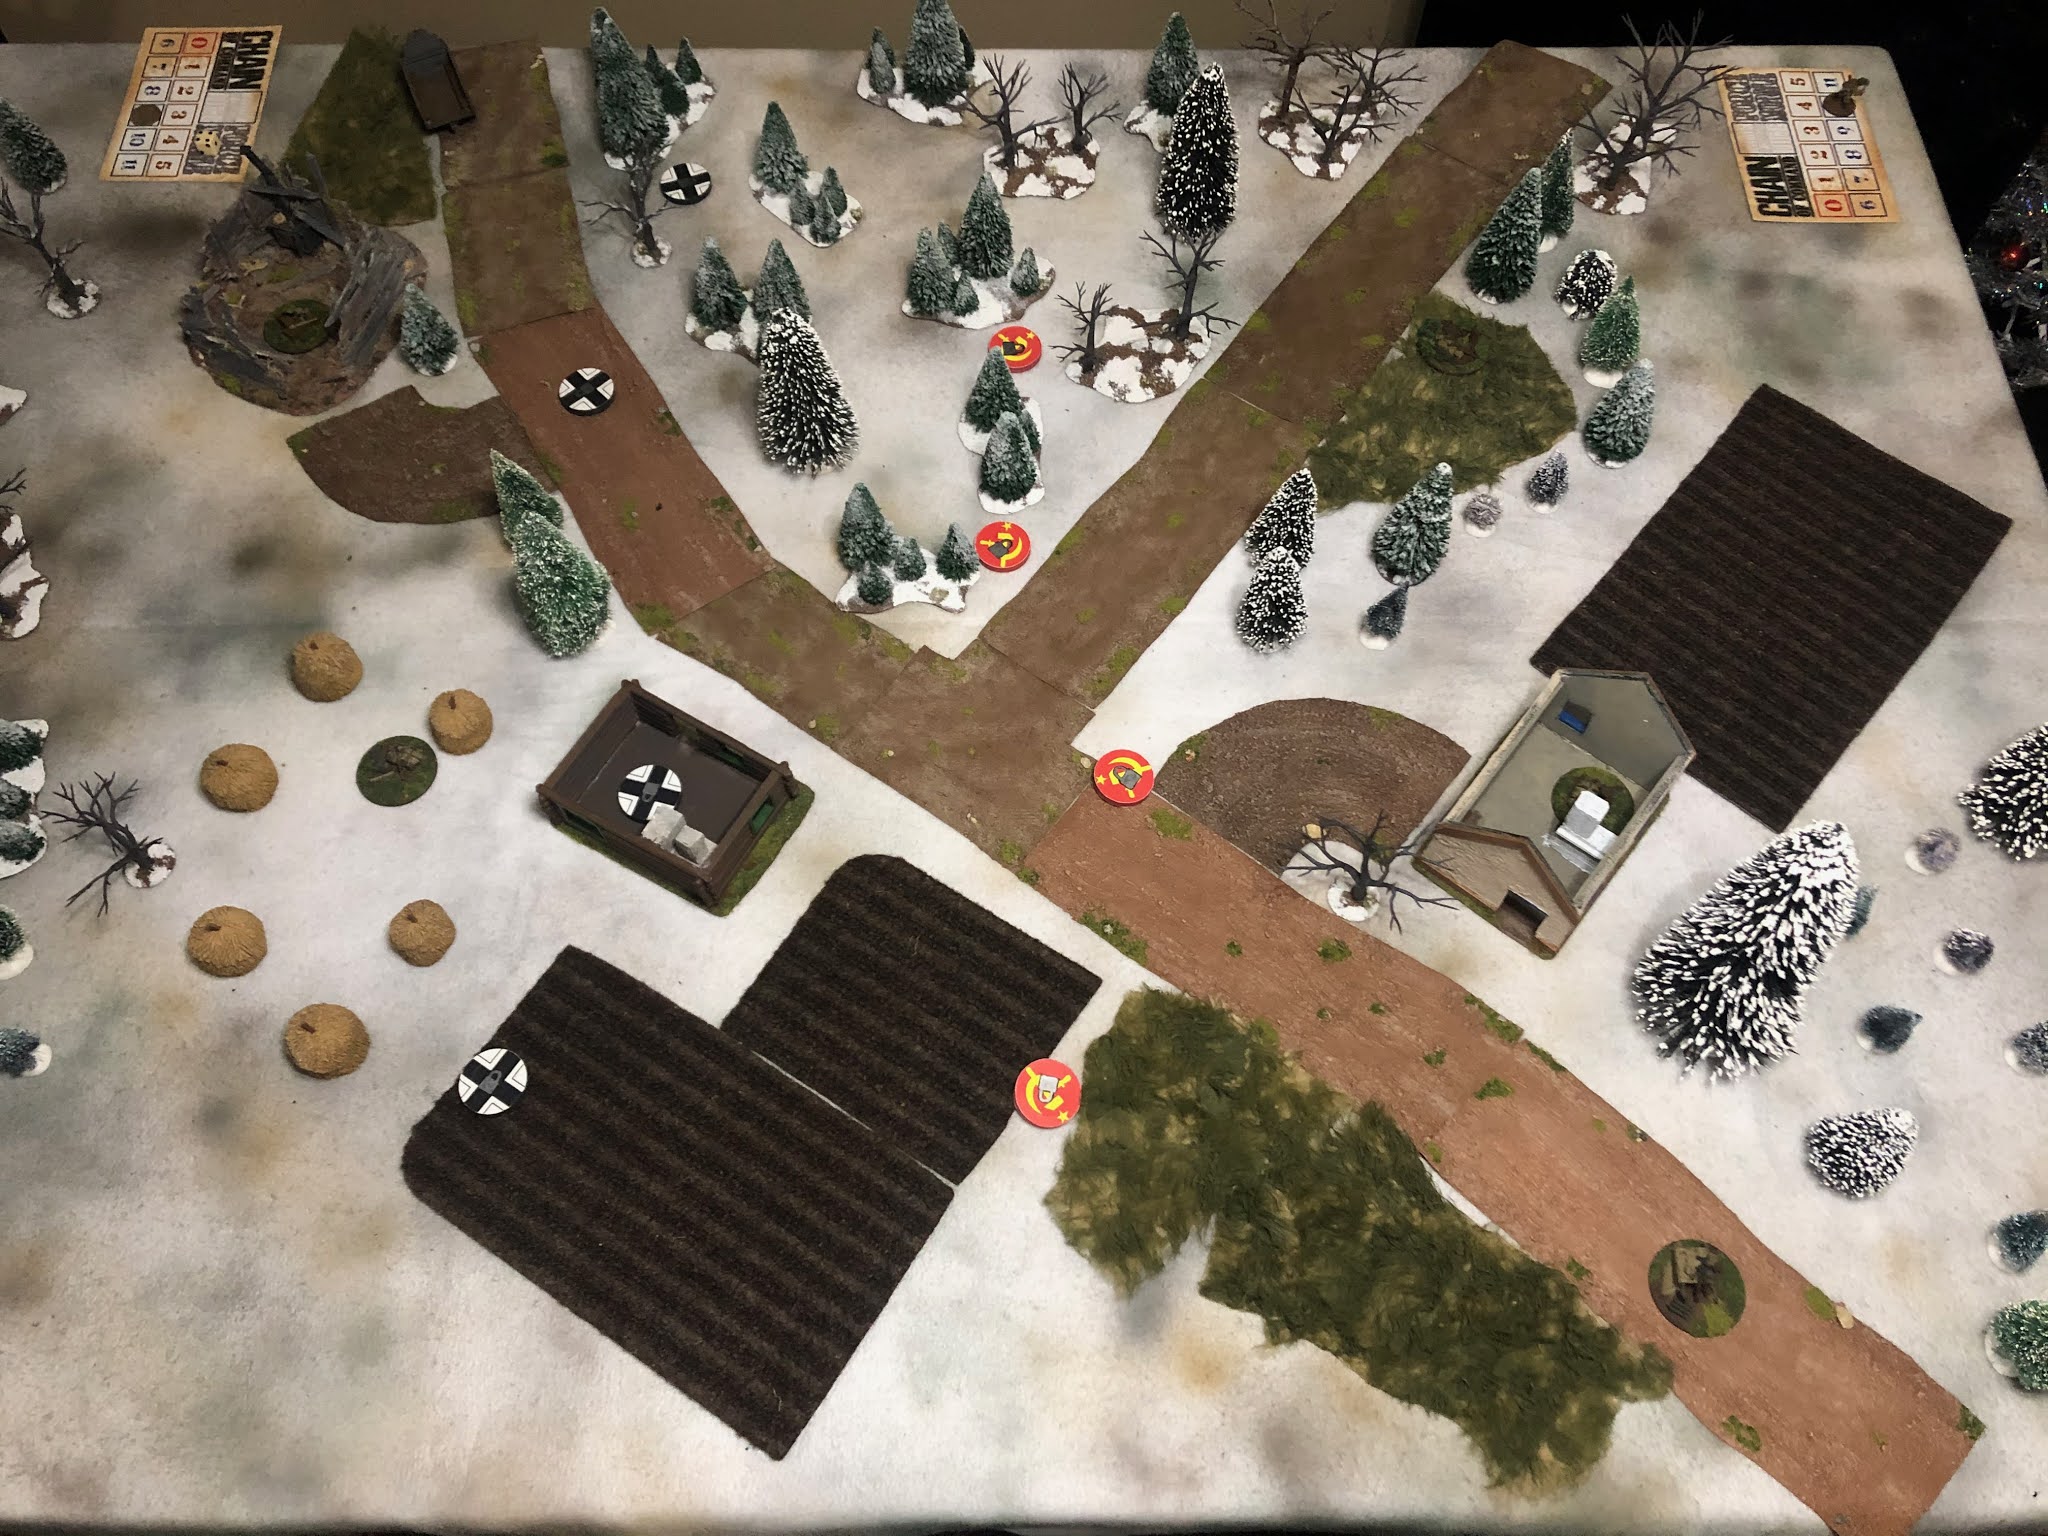
The Germans got Jump Off Points on the road on their left flank (the truck served as the JOP but was merely cosmetic - no effect on cover or support points), in the ruined barn, and in the hay field behind the log cabin.
The Soviets placed one in the tall grass across the road from the biggest patch of forest, two in the patch of woods behind the objective house (in the photo it's sitting in the road for some reason, and the other is out of sight near the table edge), and got a free fourth JOP on the objective as part of the scenario rules.
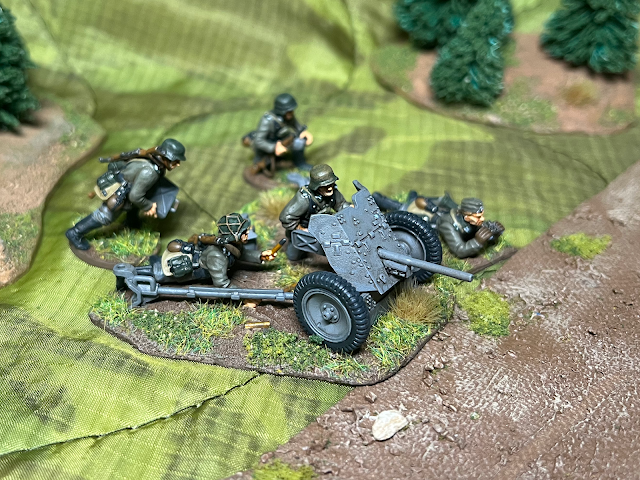
The Germans rolled 10 support points, leaving the Soviets with seven because they are rated at -2 versus the German rating of 0. I will reveal the German support picks as the game unfolds, but I can say that I chose three entrenchments and a 45mm anti-tank gun. I knew armor was likely and that I had to make the most of my cover, something I have failed to do in previous games by forgetting to spend points on trenches.

The Germans kick off the game by deploying their first squad from the back of the transport truck toward the thick snowy forest. These pioneer squads have nine-man rifle reams, bringing them to 12 men plus a Junior Leader, and I note that this squad has two extra SMGs - one of my opponent's support points at work.

The German second squad deploys behind the cabin, with the teams on overwatch looking toward the Soviet CP building.

The German Senior Leader comes on behind them, as does the third squad. At this point, I'm fairly certain the final support choice is an armored vehicle or maybe a pioneer flamethrower team, not an extra squad.
With the German attack developing in front of them, the Soviets bide their time, just gaining a Chain of Command point on their first phase.

A second German SL, a support purchase, comes on and directs the German first squad into the thick forest, hoping to maneuver through it to get close to the Soviet positions, no doubt. Any patch of forest further than four inches blocks line of sight, so they have a fairly covered approach to the objective on that flank.
Wary of this squad advancing too quickly and with good cover and concealment aiding me, I deploy one squad in their trenches from my right-most JOP and place them on overwatch toward the forest edge. Then I pass the phase without further action.


The German armor I anticipated appears in the form of a StuG III F on the table edge. The German third squad also advances across the road in the center.
I add a CoC point in my phase, but otherwise take no action.


The German phase sees the StuG move up toward the road on 3d6, and the German third squad also moves with 3d6, but only manages to get back across the road.
In my phase I pick up another CoC point, but the Soviets lay low and wait for the Germans to commit to an attack.

The StuG advances with 3d6, but doesn't get terribly far down the road. The crew no doubt have their eyes peeled for anti-tank weaponry in the trees.

The German second squad comes off overwatch and gets a move on, crossing into the open field on the German right flank. The third squad, behind the cabin, goes on overwatch down the road. We used a halftrack as the JOP here, some rules as the truck. No effect on the game, just pretty scenery.

I decide I can't resist a target like that and in my phase I bring on a second squad in trenches in front of the command post. They fire 13 shots at the Germans, who are at long range but in the open.

The effect is rather good - two dead from the MG team, one from the rifle team, and a point of shock on each.
The Germans answer by rolling three 6's, causing a double phase that also ends the turn.
The StuG rolls up the road and fires at the Soviet second squad, only managing to give them one point of shock. I don't seem to have gotten a photo of this.
My opponent asks about the StuG's top MG-34, hoping to add its 10 dice to his shooting. I argue that, in reality, the top MG should probably be treated as a coaxial for the StuG. The gun is mounted in front of the hatch used by the gunner and loader, who would be occupied with firing the cannon. The commander was in a separate cupola with periscopes and would hardly be crawling over the gun breech just to fire the machine gun at some infantry. There was some discussion of a radio operator, but I forgot that the StuG III only has four crew, and the radioman would be down in the hull and out of the way of the gun crew even if he was there. We ended up deciding that it was an either-or situation, though my opponent did try to convince me a few other times.
Let me know what you think of our solution. It seems historical to me, but it obviously limits the vehicle's maximum firepower.
 |
| Table at the end of turn one |
Regardless, we pushed on with the game, and the Germans used their second phase to activate their second SL, who ordered the first squad forward through the woods.

He then ran off toward the third squad in the road, getting them moving back across the road behind the StuG.

The other German SL orders the bloodied second squad back at the double quick, getting them into the shelter of the log cabin.
Now that the action is getting hot, I decide it's time to commit my AT gun, dug in between my two deployed squads in some trees. They deploy on a 1 and my SL comes on with a 4, ordering them to fire at the StuG and using two Command Initiative to give them a +1 to hit. In hindsight, I think only the Junior Leader on the gun can do that, but it didn't matter much as the shot missed with a roll of double 1's.

The StuG trips its overwatch in response, the HE shell putting a point of shock on the gun crew and killing a member of the squad nextdoor. I forgot to factor in the gun shield, which I think would have negated the cover-reducing effect of the HE, but then I wouldn't have been able to split to the other squad, as they would have been in different cover levels (for the HE at least).
 |
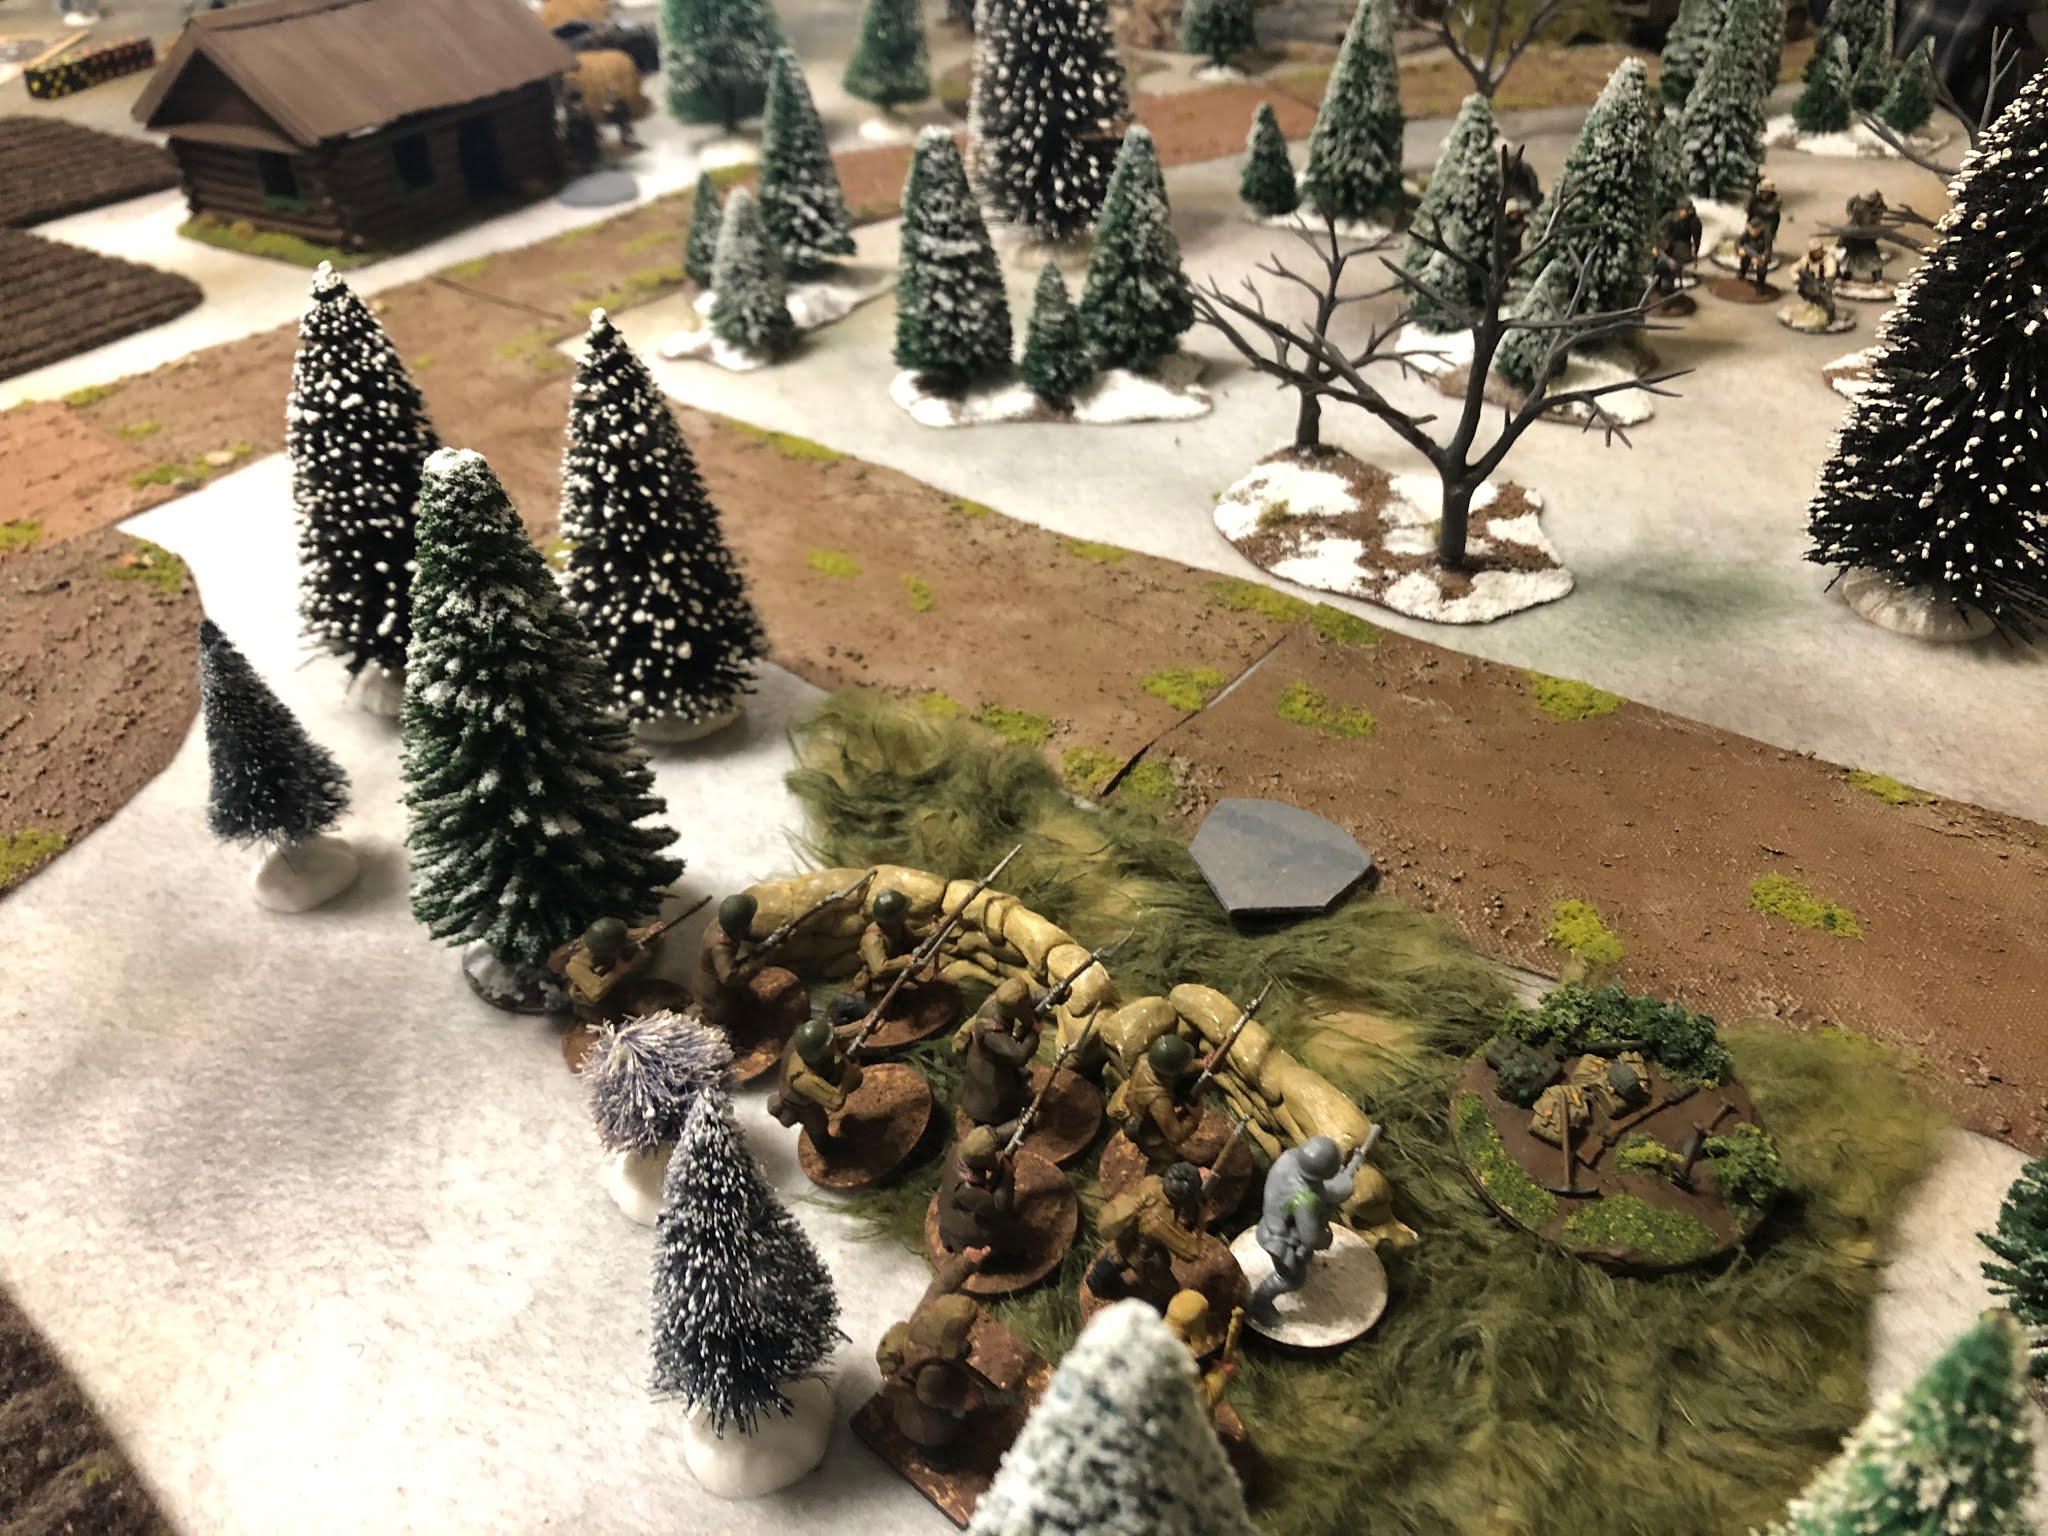
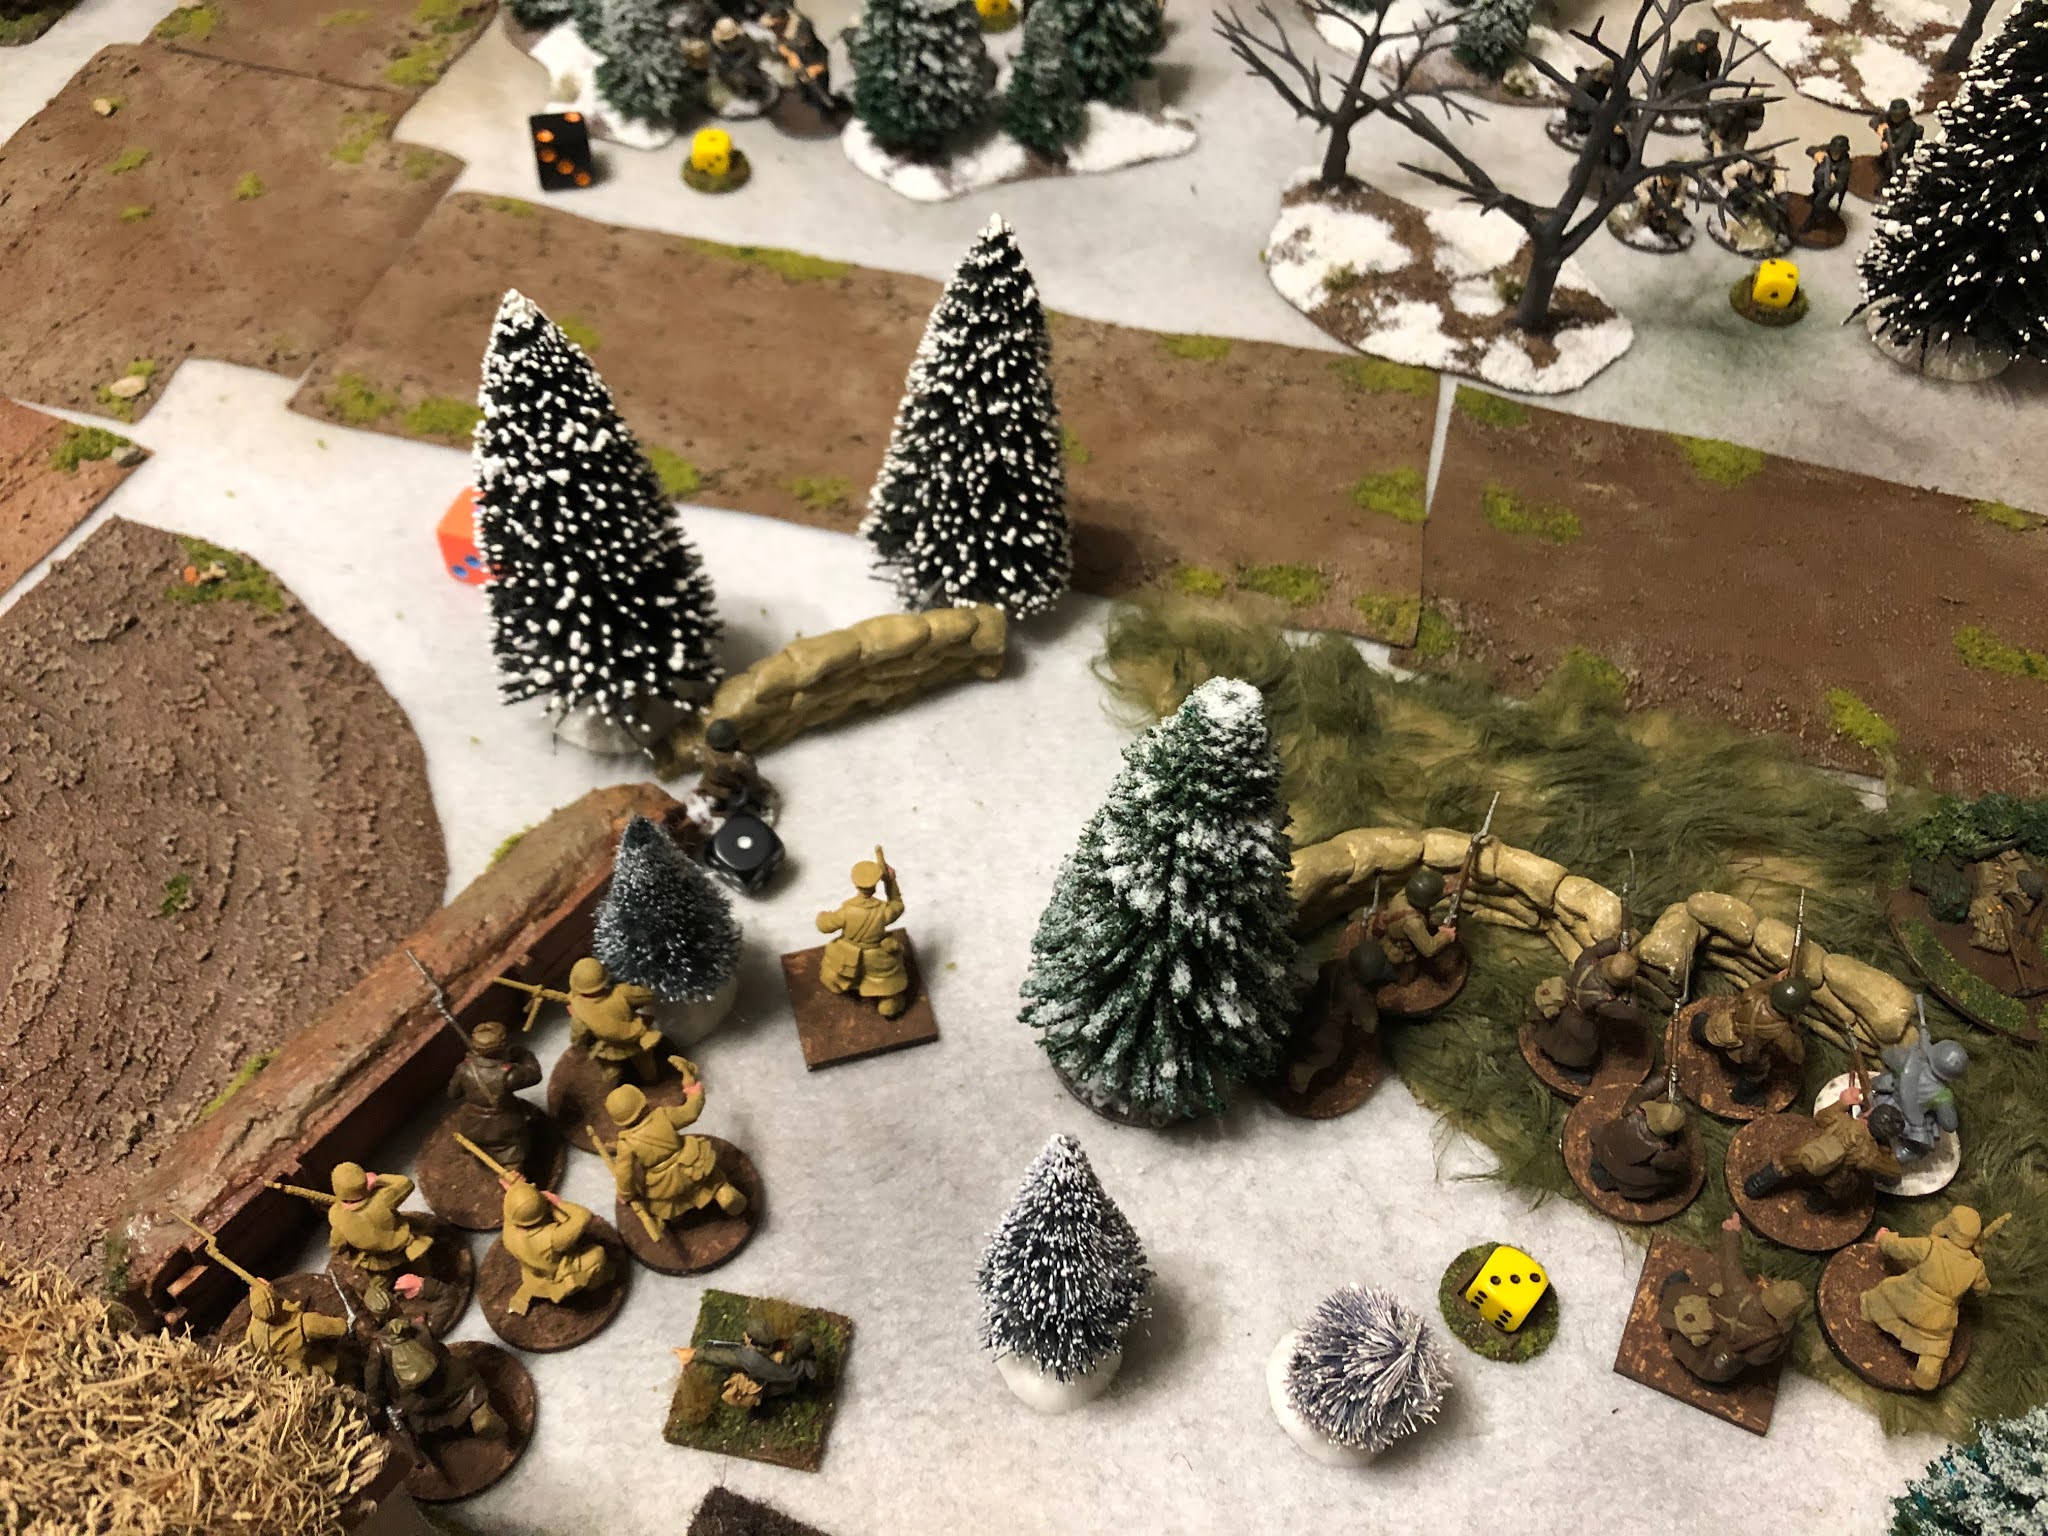
| Soviet resistance stiffens, determined to hold the line |
The Soviet second squad, standing firm in the face of the StuG's fire, shoots at the German first squad in the cabin, killing one rifleman and two members of the LMG team, as well as a point of shock on the rifles. The LMG team is wiped out after one man dead and the extra kill result goes to the rifles. This leaves the German squad with six rifleman and a JL remaining.

Despite the demise of the MG team, German Force Morale holds steady.
 |
| The Soviets have all the tools they need to do the job - can they hold out? |
In his phase, the German player rolls 66665 - a double phase, end of turn, and a random event, as well as a CoC point. Fortunately for him, the random event is the discovery of a cache of Russian vodka in the log cabin, bumping the German Force Morale up by one to 10. Despite the attack stalling for a moment, the Germans are actually feeling more motivated than when they started!
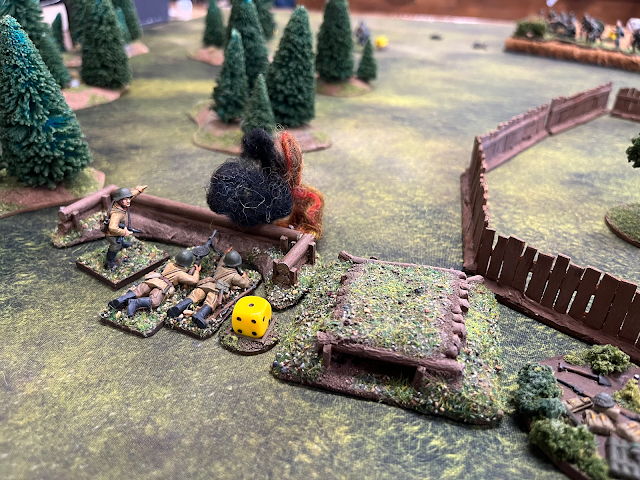
 |
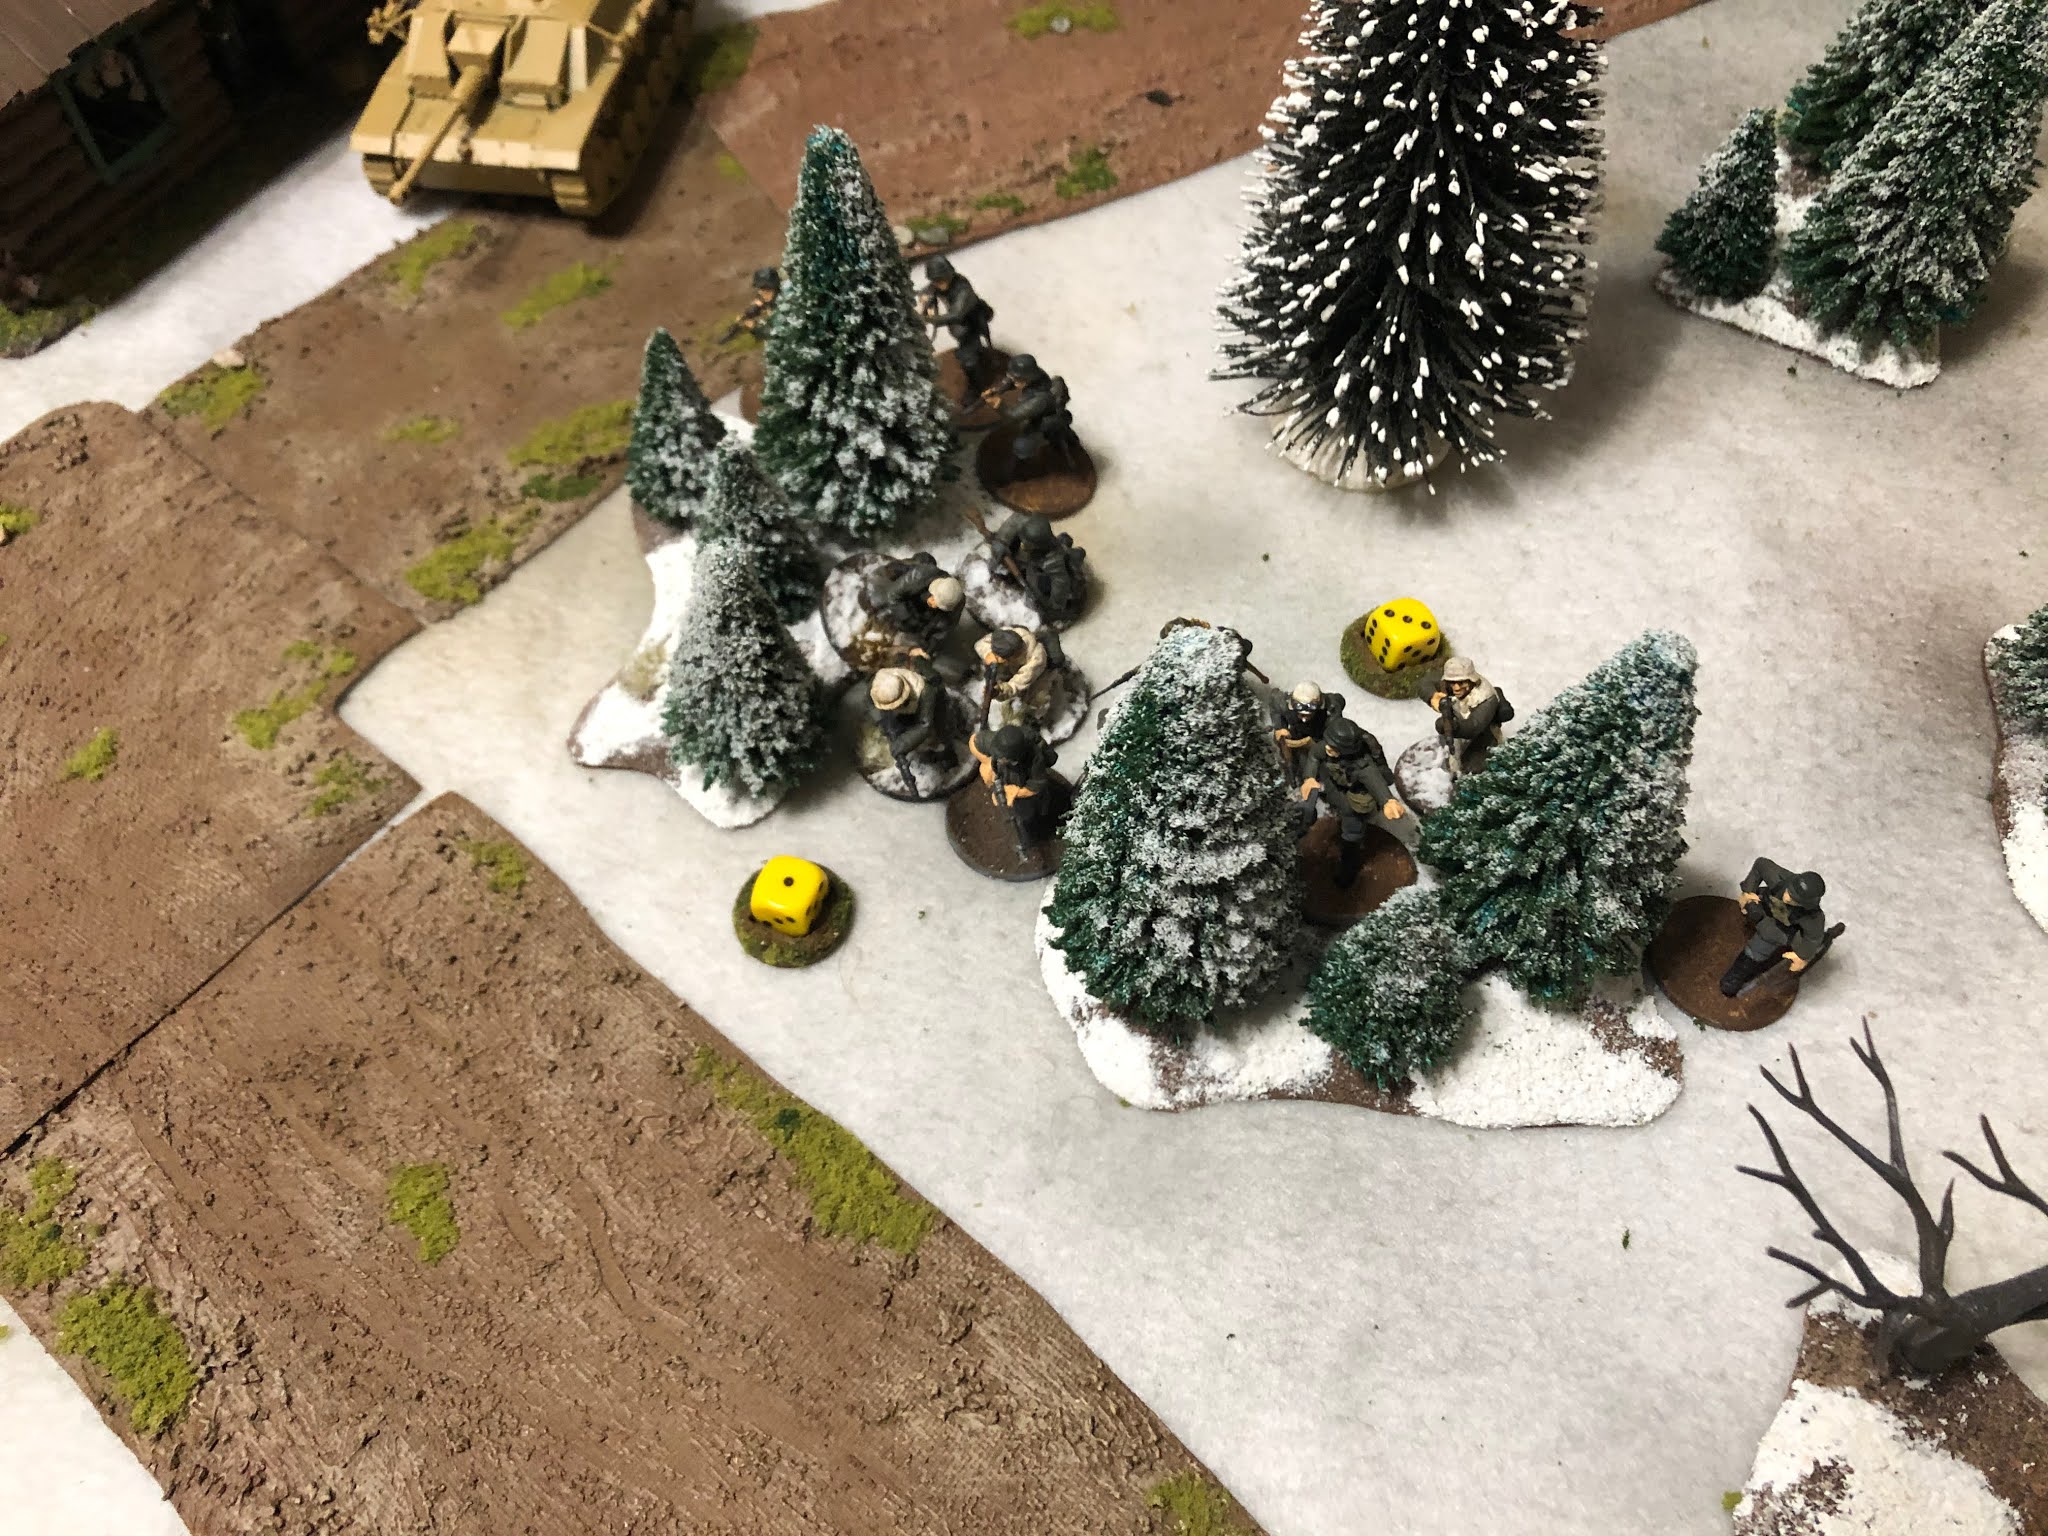
| At the start of turn three, two intact German squads are about to assault the Soviet defenses with StuG fire support. |
As turn three begins, my opponent asks me about the viability of running his StuG right over my AT gun. While I don't think he's being entirely serious, I don't think he's in that tight of a spot yet. Either way, we decide the trees and the way the gun is dug in would prevent it the StuG from getting close and crushing it under its tracks.
The StuG instead reverses, preventing the narrow side shot the Soviet AT gun had on it for the first shot, and fires an HE shell, killing another member of the gun crew.
The German second squad fires from the cabin, but has no effect on the gun crew. The third German squad advances to the edge of the forest and fires at half effect, putting a point of shock on the gun crew.

In the Soviet phase, the SL pulls shock from the gun crew and has them fire, but the Germans burn a CoC die to interrupt and fire on the gun crew again with the third squad. They kill another crew member and put two shock back on the team, causing them to miss the StuG.
In retaliation, the first Soviet squad opens up on the Germans in the trees, putting one shock on the MG team and three on the rifles.
At the same time, the Soviet second squad fires on the Germans in the cabin, the only enemy they can easily see. Six hits sees another German rifleman killed and four shock put on the crumbling squad. Thankfully their JL and the SL behind the house have kept the shock off and they hold steady for now.

In the German phase, the SL in the forest orders the German first squad to move up, nearing the edge of the woodline. He also has the third squad shoot at the gun crew. Fortunately, 13 hits only results in one shock on each Soviet unit in the line.

Now the Soviets get a double phase, and I am intent on hammering that StuG and the squad in the cabin. The Soviet line is holding, but the Germans still have too many units applying too much pressure, and they can put out more shots than the Soviets.
The Soviet SL pulls two shock off the gun crew and orders them to engage the StuG again. This time, despite the remaining point of shock, they hit. It's five strike dice versus five armor, and the Soviets manage two net hits after the Germans save one. The result is the StuG takes one shock and reverses 1d6, knocking down a tree.
 |
| A 45mm shell convinces the StuG to back off - fortunately the German SL is paying attention and sidesteps to avoid the tracks. |
The Soviet first squad fires at the cabin again, wounding the leader and dropping four shock on them. The leader may not be activated this turn, and the remaining riflemen are pinned - they are now in hard cover as a result of being pinned in light cover (wooden building).

The JL wounded drops German Force Morale by one point to nine - back where they started. Serves these pioneers right for getting drunk on looted vodka while there's still a job to do!
In the next Soviet phase the JL on the AT gun rallies their last point of shock off and fires, hitting the StuG again. This time it's two net hits, putting two more shock on the vehicle crew and killing the gunner. It'll take two phases for the loader to get over that significant emotional event and get behind the gun sight. Worse, the crew will decide to abandon the vehicle and flee if they take another point of shock.
 |
| "Gunner, that vehicle offends me - remove it." |
In the meantime, the JL of the Soviet first squad rallies his men and fires at the cabin again, killing two more men and adding another point of shock. This is enough to break that team, and they book it out of the cabin, carrying their stunned JL with them.

This drops the German Force Morale by one point, to eight.
At the same time, the Soviet first squad fires on the German first squad, who are now visible in the trees across the road. The put two shock on the LMG team, one on the rifle team, and kill two riflemen.

It's the German phase again, but the Soviets spend their CoC die to interrupt and fire again with the AT gun - the gunners just manage a hit, but the StuG's armor bounces it, sending the shell whizzing off into the woods harmlessly.
Fed up, the StuG commander orders the loader (recently promoted to gunner) to get on the top MG-34 and fire at that AT gun. The fire is surprisingly effective - killing one of the AT gunners and two men from the Soviet second squad, closest to the objective building.
Soviet casualties are beginning to mount, but the German attack seems to be faltering.
The German third squad also fires at the gun, but has no effect. The German first squad, however, puts three shock on the Soviet squad in front of them, one shock on the gun, and kills another crew member.
 |
| The AT gun is reduced to a gunner and the team's JL |
In the Soviet phase, the SL pulls a shock and uses the remaining 2 CIs to give it a bonus to hit, which it does - but the shell bounces as the German steel protects the StuG's crew.
The Soviet first squad returns fire on the German first squad, managing only a point of shock on the rifle team.
In an attempt to seize the initiative and blunt the German attack for good, I deploy the third Soviet squad, passing my roll to get them on the table despite the SL already being deployed.

Unfortunately, the freshly arrived Soviet squad has only light cover, and the Germans open up on them in retaliation, killing three and putting three shock on them immediately.
 |
| "Welcome to the war, Ivan!" |
The German third squad fires again at the AT gun, trying to take the pressure off their armored support. They finally succeed in killing the last gunner and wounding the crew's JL. I believe I could have left the gun on the table and had the JL operate it, but we decided to remove it. The firing also killed another man from the Soviet first squad for good measure.
 |
| The gun crew lies dead, their leader slumping against the sandbags nursing a wound. |
It's the first morale hit for the Soviets so far, but it's a doozy - down one point for the support unit killed, and down two more for the wounded JL, leaving the Soviet Force Morale at seven.
Just as things start to look a little iffy, the Soviets come up with a double phase. The Soviet platoon leader is ready to rescue the situation, ordering the gun crew's JL to scram with 3d6, sending him to hide behind the objective building. Next, he has the Soviet second squad take over the entrenchments left vacant by the gun crew so they can get a good shot at the Germans across the road. He has the Soviet first squad fire at the German first squad, killing a rifleman and wiping out the LMG team with two kills.

The loss of the LMG team has no effect on German Force Morale, however. The pioneers are still in the fight.
In the second Soviet phase, the platoon leader strips three shock off of the Soviet first squad, freeing them up to join the Soviet third squad in firing on the German first squad, now just a rifle team. Between them they kill two more pioneers and put a pile of shock on, pinning the Germans in the trees.

The Soviet second squad can't manage any kills or shock on the last relatively intact German squad.
In the German phase, the StuG's cannon is back in action, but only manages to put one point of shock on the Soviet second squad.
The unpinned German squad still has some fight in it, targeting the two entrenched Soviet squads and putting a dead and two shock on each of them. The JL follows up with a hand grenade, which lands in a Soviet trench and kills a man.

In what seems like a crucial roll, the Soviets get a double phase, allowing the central Soviet squad to pour fire on the pinned Germans. Even with the effect of heavy cover, two dead pioneers and two more shock are enough to break that rifle team, though they only retreat about six inches into the trees - just out of sight.

German Force Morale drops one point, to seven, as a result of the broken squad.
Seizing the initiative, the Soviet third squad advances quickly across the road, eager to run down the broken Germans and maybe get out of sight of the remaining German sqaud.
 |
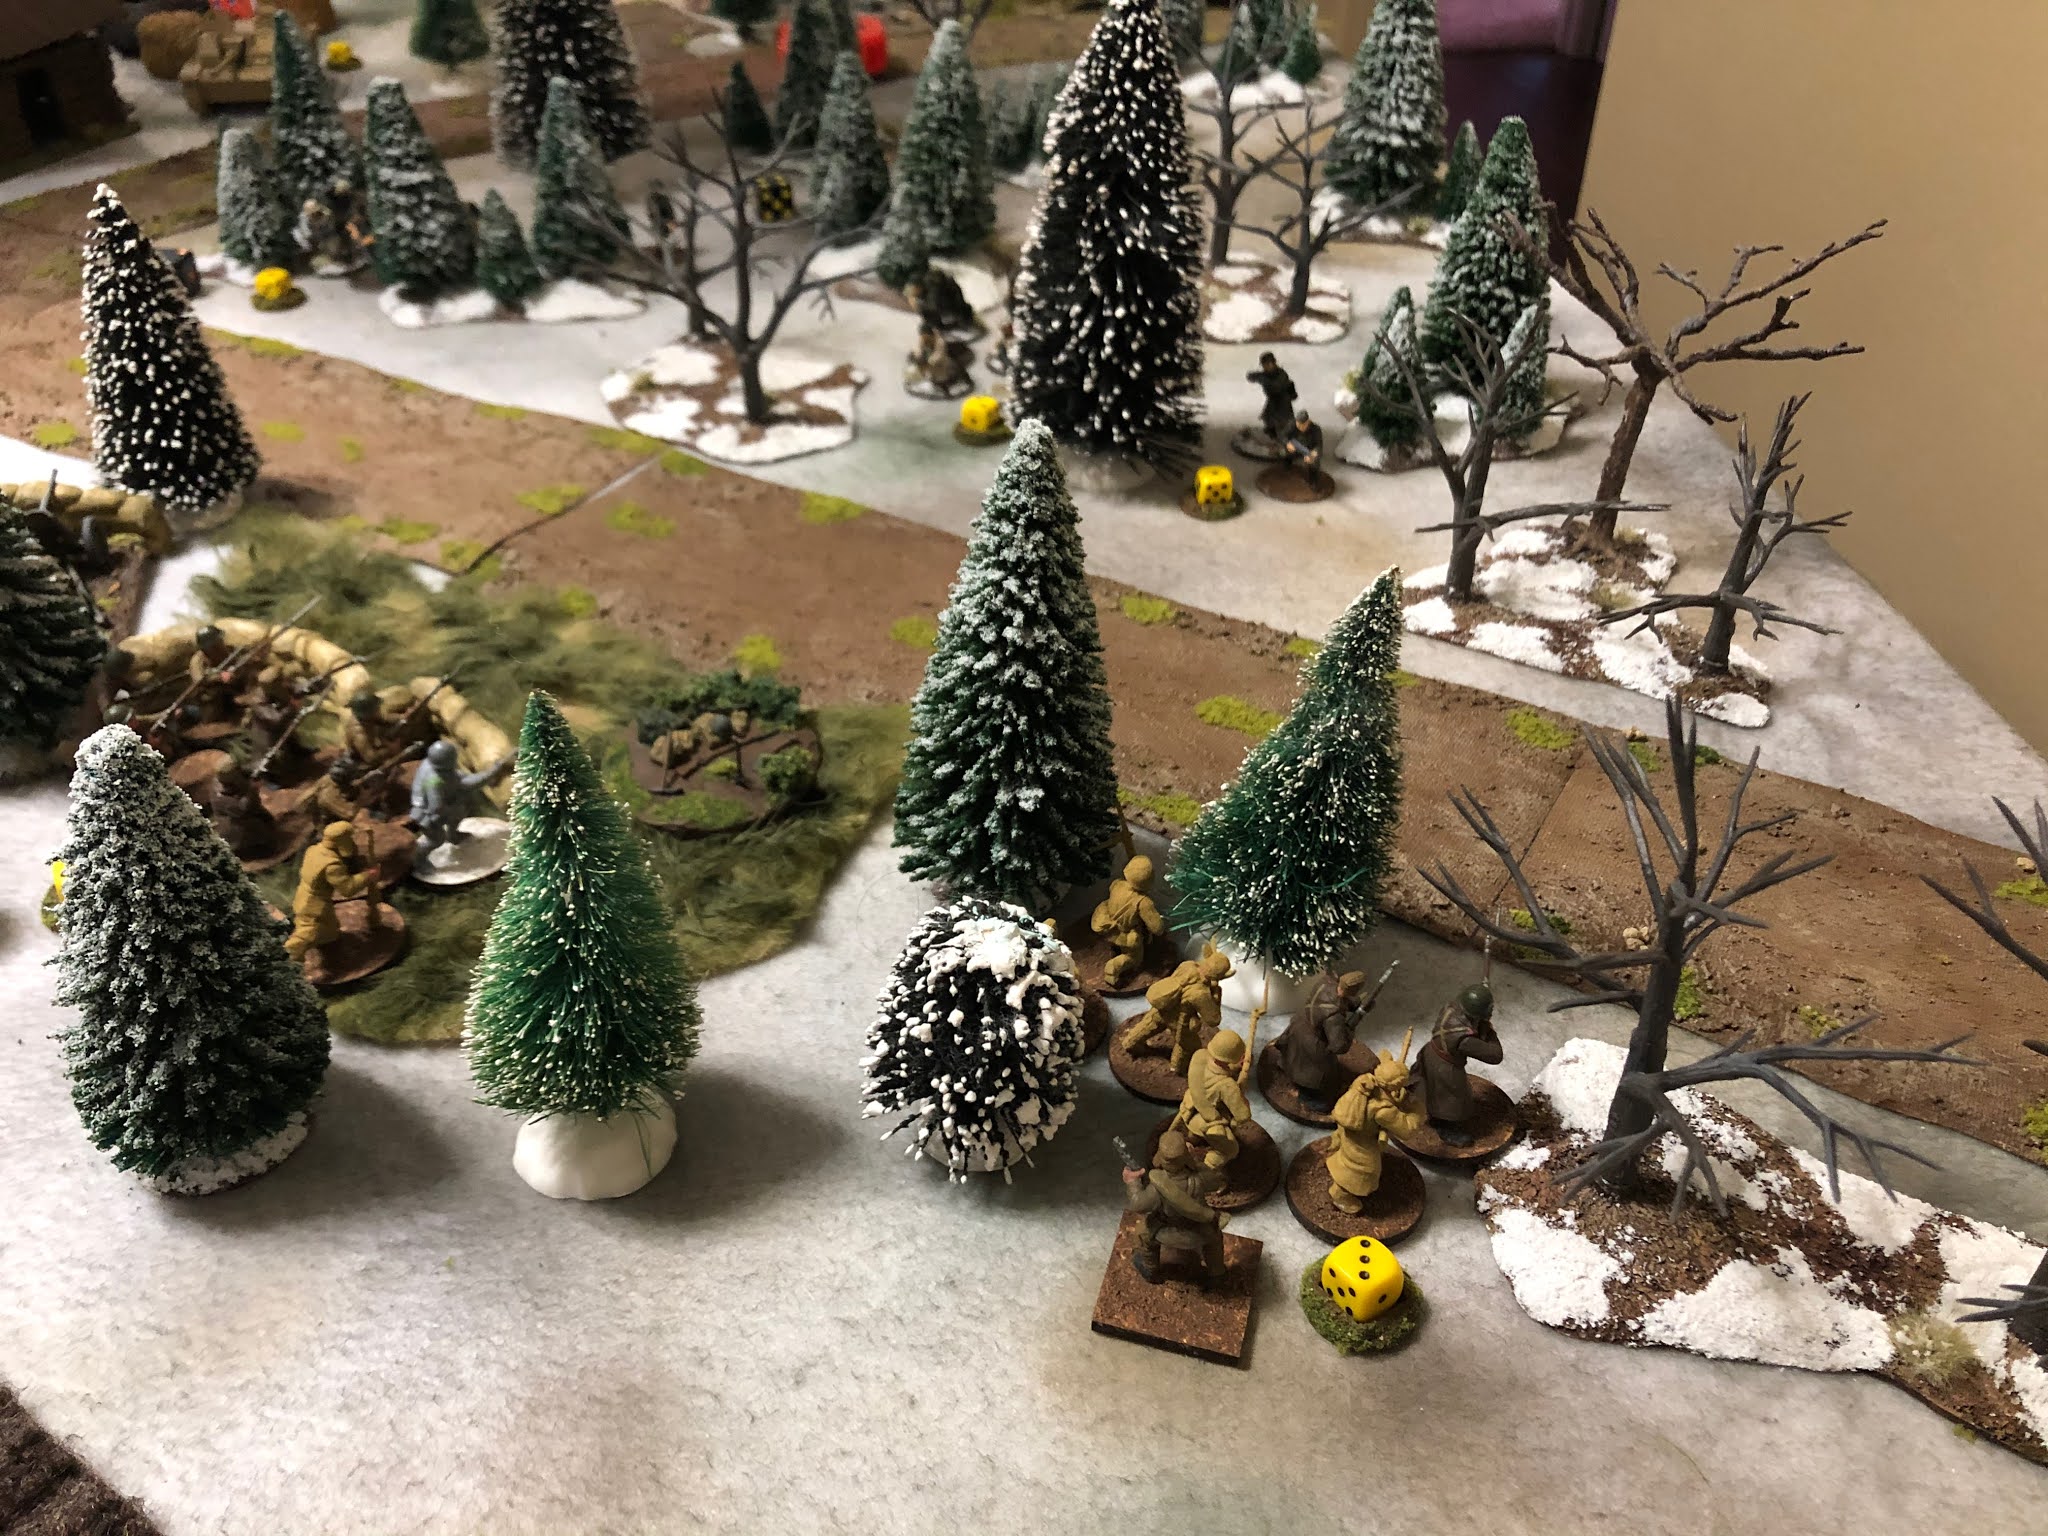
| "Find the cowards! No mercy!" |
In the second Soviet phase, the Soviet first squad places covering fire on the Germans at the crossroad, meaning they will get a -1 on their to-hit rolls for the next phase. The Soviet SL has the other squad fire at the Germans, killing one man off the LMG team.

The suppressing fire lets the Soviet third squad get into the trees, where they spot the broken Germans and fix bayonets, their JL pulling one of their shock.

In response, the Germans break off their attack, their unpinned squad moving to intercept the aggressive Soviet squad. They get just close enough for a few rifles to fire at half effect. A shot rings out through the trees, but it's a miss.

One of the German SLs, who has been hanging back out of range in the woods, pulls a shock off this squad after it moves and fires. Across the board, the other SL succeeds in pulling all of the shock off of the broken German team. However they are still broken and without a JL until the turn ends.
 |
| I have my doubts that these few pioneers will save the day for the Germans. |
Looking to cap things off, the Soviets charge at the broken Germans in the woods. We do the math roughly and believe that the odds are 4 to 1, meaning the Germans lose immediately and rout off the table with their JL.

This drops the German Force Morale by two points to five.
Back at the Soviet trench line, the SL pulls one shock from each of the two squads and orders the first squad to cross the road, hoping to take the final German squad in the side and prevent them from gunning down the victorious third squad.

However, in the German phase, the StuG finally gets moving again. Without the threat of the AT gun, the vehicle is free to advance to the crossroads, turning and firing at the Soviets crossing the road, giving them two shock.

Determined to inflict maximum casualties to the bitter end, the German squad fires on the Soviets as they finish mopping up the broken Germans, putting two shock on them.
In the Soviet phase, the third squad turns about and fires at half effect at the new line of attackers, giving the rifle team two shock. At the same time, the Soviet squad crossing the road fires as they advance into the trees, killing one pioneer, inflicting a shock, and wounding the German JL.

Although German Force Morale was unaffected by the wounded JL, at the start of his phase, my opponent withdraws, seeing that his last combat-effective squad is getting surrounded and will likely face a double-charge next phase. His StuG is unopposed with the AT gun knocked out, but we decided that the damaged vehicle would likely withdraw when its infantry support fled.
After Action Report
I think we both had a great time this game, and I think we each felt it was fairly close. It wasn't until writing this report that I realize how much the curve of the road and the thick forest shielded me from fire until the Germans were at very close range. We designed the table before we picked the scenario, so this just comes down to the fortunes of war, I suppose.
At the end of the day, the Germans lost the better part of two squads, had several leaders injured, the StuG was damaged, and they failed to punch through the Soviet defense line. The Soviets lost an AT gun and three or four men from each squad.
Until now, I don't believe I have ever managed to beat the Germans with a standard Soviet infantry platoon, so I feel pretty good about myself. I picked the right support for the job, and I think my opponent did too, though I might have been tempted by a flamethrower or light infantry gun. A mortar barrage would have really given me trouble, with my tight defense perimeter. The larger pioneer squads were a formidable force and bump up the German firepower even without the additional LMG from the dreaded panzergrenadiers.
Comments
Post a Comment