Forestry 101

This week, I've been working on getting some winter forests done to flesh out my terrain collection. I already have some regular summer pine trees and some small orchard trees, but I wanted something purpose-built for winter-y games, seeing as my main interest is the eastern front.
To that end, I just finished up 12 bases of winter pine trees and five standalone pines, as well as five bases and five single deciduous trees. This should give me enough to cover a decent section of tabletop.

I've chosen group basing for my trees because the idea of making a forest from single trees sounds exhausting. The best option, I think, would be large bases with removable trees, but then you run into the problem of dozens of single trees again, and storage of larger bases could be a pain.
So I settled on clusters of three to four trees on a single base that can give the impression of a thickly forested area while leaving spots to place troops. The large bases also prevents careless players knocking over a whole forest with one swipe.
My pine trees are improved Christmas village trees prepared in the method suggested by Jeremy of Black Magic Craft. I prepared these in a large batch a while back and used them as needed, so unfortunately I don't have photos of the process. Jeremy's video is great though, check it out.


I glued the plastic bases of the WS trees directly to the bases and then textured the base with brown tile grout and dried herbs. I would normally use Vallejo's texture paste or spackle/wall filler mixed with sand, but I've been trying this grout and have been pretty pleased. The herb method comes from Mel the Terrain Tutor's Burma terrain build, but I have seen others do it.
I like the texture it gave the pieces, but some of it flaked off during the later drybrushing, so I maybe should have sealed it in with watered down PVA glue.

The pine bases get cork and more grout. This is to give the thin metal stems of the trees something to grab onto when they're glued in without adding too much height to the base. I don't like scatter terrain that rises dramatically from the ground around it.
 |
| The whole gang |
After this, I gave them a coat of dark brown spray paint. This probably wasn't strictly necessary because of the basing materials I used, but I'm used to using white texture pastes that need painting over. This paint color is really too dark for my tastes, and it's satin instead of matte, but I had it lying around.

 | ||
There are blobs of blu-tac over the stumps of the WS trees to help keep the colors of the trunk uniform.
|


 |
| Winter has arrived |


 |
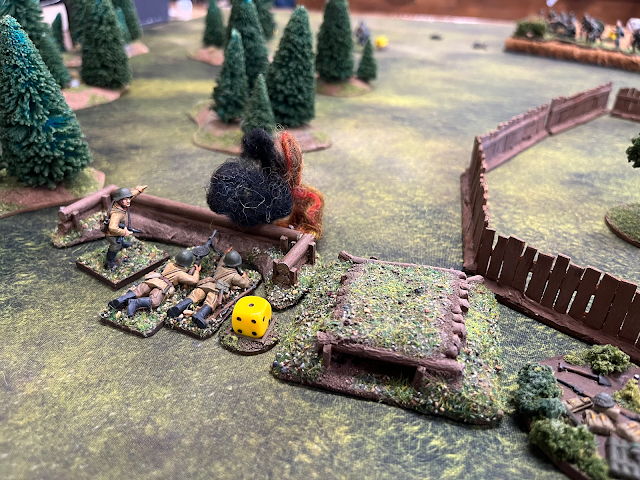
| Very subtle Finally, some shots on my winter mat with some minis and a cozy little Russian hut.    |
Nice!!!
ReplyDeleteThanks, glad you liked
Delete