By Any Means - Chain of Command in France, 1940
This week, my regular opponent Jesse and I were joined by two friends that we haven't gotten to game with in months, so we took a break from the French and Indian War campaign using Sharp Practice to return to Chain of Command, which is my favorite, at least, WWII ruleset. Some people in our group feel differently.
We really enjoy games set during the Battle of France in 1940, but don't get to do them very often because only one person in our group has enough French built and painted to play. In this game, Jesse and I will be taking command of a mixed German tank force and a German Kradschützen motorcycle recon platoon, respectively, in a game of Big CoC. Our opponents will have a French tank platoon and a platoon of Chasseur light infantry.
The scenario is Hasty Defense from the France 1940 book. The Germans are tasked with moving a unit off the enemy table edge while keeping two thirds of the table clear of enemy forces. The French must repel them and stop a breakthrough. They haven't had time to dig in, but they have the advantage of fairly dense French terrain.
The table is dominated by an old stone church in the French center, flanked by some buildings, a wooded area on the French right, and an orchard on their center-left.
Before the patrol phase, a flight of German Stuka dive bombers descends on the little village, hammering the French lines. The explosives mostly miss the buildings - the only damage is an unexploded bomb lodged in the upper story of the cafe on the French left - but the effect on the French troops, who have no anti-air defenses in this sector, is more important.
For those unfamiliar with Chain of Command, the Stuka attack forces the target to roll a d6 any time they want to deploy a unit, succeeding on a roll of 4 or higher. If that unit succeeds, it will still suffer 1d6 points of shock per team. It's a more exaggerated version of the pre-game artillery barrage support option, which has the same effect on deployment, but does not inflict shock, and also does not affect vehicle deployment like the Stuka attack does. The Stuka attack costs twice as many support points, but we choose it over the arty barrage here.
Both effect of the pre-game bombardment and the Stuka bombardment support options end when the turn ends, which can be quite some time in Chain of Command.
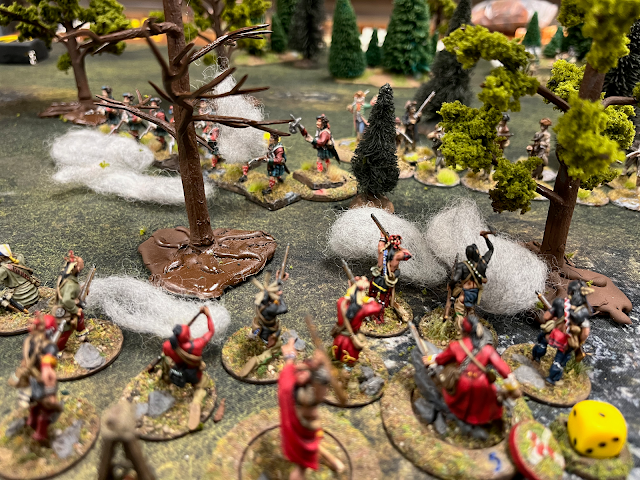
The German motorcycle troops have patrolled aggressively, and with their 9" deployment they quickly get into the orchard. They have a double phase and think it's possible they can get into that church before the French defenders recover from the airstrike.
The German Feldwebel joins them, urging them forward to the edge of the orchard. Another squad maneuvers through the wheat on the German left flank and sets up against the hedgerow, covering the road system outside the church.
The effects of the Stuka attack keep the French from deploying. They have a jump-off point in the church they'd really like to protect, and plenty of tanks to hit the Germans with, but they can't bring that force to bear. The German Feldwebel directs his men to sprint across the road, making a break for the church. They fix bayonets and grip grenades, preparing for a bitter close quarters fight with the French defenders.
But the men breathe a sigh of relief when there are no Frenchmen to be found. They lock off the JOP, robbing the French of the center of their defense.
Meanwhile, the first German armor appears behind the stone barn on the German's center-right. It's a Panzer II, the backbone of the German armored spearhead in France. This is a 1/48 Tamiya model Jesse painted. I haven't gotten my hands on Rubicon's new 1/56 Panzer II yet.
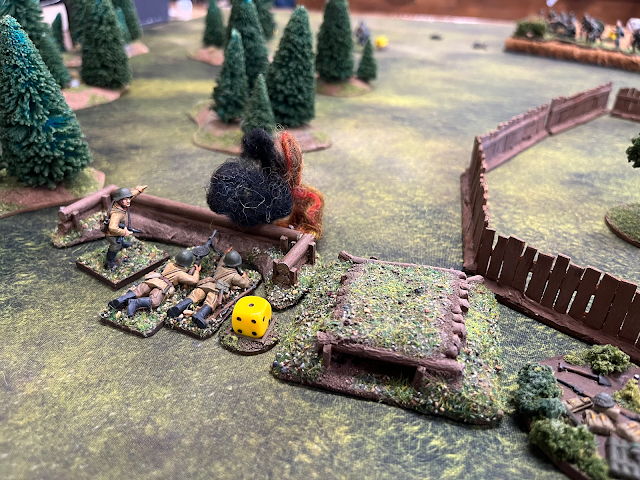
Finally, the Germans spot the first French unit to arrive - a squad lining the fence across the street from the church. They're carrying some shock from the Stuka attack, but aren't doing too badly.
Another squad manages to get on the table, in the wooded area on the French right flank. They have more shock on them from the bombardment.
The French are in a bad spot. They declined to put a jump-off point on their left flank because they were worried about the unexploded bomb in the cafe. However, the Germans have a JOP in some tall grass about three-fourths of the way across the table on the French left. With the church held, there are no French forces in two of the three table sectors. All the Germans need to do is push a unit over the table edge before the French tanks can deploy through the barrage, and they'll have a bloodless win.
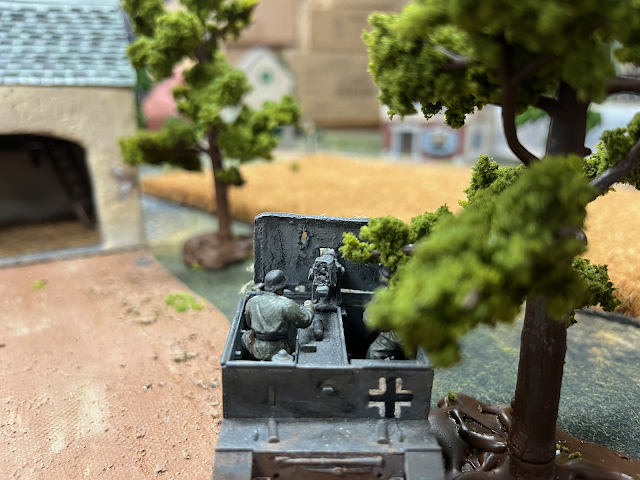
However, we decide that wouldn't be a very entertaining game and elect to meet the French in battle. To that end, Jesse brings on the second German armored fighting vehicle. It's a bit of a Frankenstein's monster of a tank hunter - a captured British Expeditionary Force Bren carrier with a captured (probably Dutch?) Böhler 47mm gun.
There are original photos showing several versions of this thing, though we did have some debate if these would have been constructed during the Battle of France, or after. We think probably after, but decided to bring it for the fun of it.
Almost immediately, it has a French tank to contend with - a Renault R40 (or maybe R39?) that has managed to deploy through the chaos of the Stuka attack. It starts dueling with the tank hunter and quickly picks up a shock. My notes on this fight were not detailed, but I think it took a hit to the road wheel, slowing it down.
However, more concerning than the gaudily painted light tank is the arrival of a Gallic steel beast - the Char B1. It comes clattering down the road past the church, prompting the Germans in the church to duck out of sight under pews. Behind them, a third squad of French troops is gathering their courage to re-take the church. They have a good bit of shock from the Stuka, though, making them reluctant to move.
On the other flank, a real tank arrives to help out its mutant little brother.
The Panzer IV quickly sends a shell crashing into the R39, knocking it out. Smoke billows from the commander's hatch, but I think the crew made it out. However, there's still an effect on French morale.
The Germans don't have a good answer to the Char B1, but they've been ravaging the French infantry. The squad at the hedgerow and an off-table MG-34 have picked off several men, wounded the section leader, and dumped shock on, pinning them against the fence.
Even the platoon's light mortar gets in on the action, flinging 50mm high explosive bombs over the hedge and crashing into the Frenchmen in the yard. The Germans still have a squad and their platoon leader waiting in the wings to reinforce or exploit a gap. The French have stabilized their line some, and there's now no way for a sneaky win.
During the course of its attack, the Char B1 has shot the Panzer II, driving it off the table with shock. It may return later. In reply, the German tank hunter has moved around to the other side of the barn, lying in wait for the French heavy tank. I can't remember if that shock is from the fight with the R39 or the first shots from the Char.
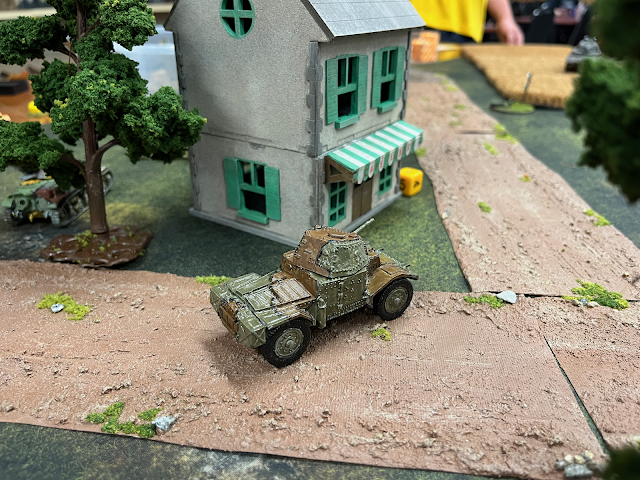
The armor fight begins to go badly for the Germans, though. The Panzer IV commander orders his vehicle into the wheat field, where it is summarily killed by a newly arrived French Panhard lurking behind the cafe.
The German tank platoon's morale is down, but the infantry have held firm, despite the death of the squad leader at the hedgerow. Speaking of that hedgerow, the French heavy tank comes crashing through a gap in it, threatening to run over the German troops there, who had tried to get out of sight of the tank's howitzer in a previous phase.
Encouraged by the success of their armor, a French squad leader orders his men to charge in and retake the church. However, his squad is carrying a lot of shock from the Stuka attack that he has yet to remove. He goes in with his machine gun team, but the rifle team lags behind, left out of range of the combat.
Inside, the fight is vicious. The Germans have no shock and have taken no casualties. They have their MG-34 trained on the doorway and cut down several Frenchmen as they rush in. The rest is handled with submachine guns, bayonets, and entrenching tools. For those familiar with Chain of Command's close combat system, the Germans have 37 dice to the French's 9 in the first - and only - round of combat.
The French kill three Germans, but the machine gun team is slaughtered. Amid the bodies sprawled over bullet-riddled pews, the Germans find the badly-wounded French squad leader and take him prisoner.
Despite their success, things are getting bad outside. The French squad by the fence has been hammered by machine gun fire and mortar shelling, but they are encouraged (or maybe confused?) by the arrival of another tank, a WWI-era Renault FT-17. Despite the tank's age, the German infantry can do very little to it.
Now, a few things happen all at once that I didn't get good photos of. The French infantry platoon's morale totally collapsed, forcing them to leave the table. That's good for the Germans, but they still have no answer for the French tanks crashing through their lines.
The Panzer II returned to the field but was quickly knocked out by the Char B1. The tank hunter's efforts to kill the Char B1, even by shooting it in the side, have not gone well, and it's gone into hiding after having its main gun knocked out.
The French Panhard is also closing in on the flank, threatening to squeeze the little tank hunter between it and the Char B1. However, the silver lining is that the tank hunter's last shot was a critical hit on the Char B1, and the big French beast only requires one more point of shock to make the crew bail out. Without a main weapon, the German crew has no other option.
They'll just have to ram the big bastard.
The Panhard shoots the little carrier from behind as it rattles forward, putting on two points of shock, but it's not enough to halt it. It crashes into the big French tank, trying to wedge its running gear into the working parts of the enemy vehicle.
The two collide with a terrible metallic screech and careen off each other, each inflicting a shock on the other. Both crews come tumbling out of their damaged vehicles and flee. However, the French morale can't take the blow, and their tank platoon routs, giving the Germans a narrow victory. With the crew of the Char B1 bailing out far behind German lines and with enemy infantry nearby, their fate seems doubtful.
Editor's note: After posting, I realize I handled the shock on vehicles wrong. I was under the impression that the number of shock a vehicle can take is equal to its leader's command initiative. In fact, per page 63-64 of the core rulebook, the level is (to my mind, arbitrarily) set at 3 for JLs and 4 for SLs, meaning JL-commanded vehicles would bail at 4 shock and SL-commanded vehicles at 5 shock. The Char B1 was a SL-commanded vehicle, I think, so it would not have bailed at 4 shock as I thought at the time.
Furthermore, I did not realize that vehicles that are immobilized or have their main gun KO'd take double shock from any subsequent hits. That means the Panhard's final shot during the tank hunter's final charge would have inflicted 4 shock and bailed the crew before it was able to ram the Char B1.
The misinterpretations are definitely my mistake, as the other players have played far less Chain of Command than me. However, in my defense, I think we got a much more exciting game, even if we got the rules wrong. The "rules-accurate" result would have been a German infantry platoon that had total control of the field but no AT weapons to handle a battered French tank platoon that would have had to systematically pick off individual infantry units. I'm not opposed to that kind of stalemate in my games, but it's certainly less exciting. Your milage may vary.
Hopefully you can forgive my mistakes and enjoyed the action anyways.




Looks like a fun game!
ReplyDelete