Digging In - Bunkers and Entrenchments for 28mm Wargaming
Over the last couple weeks, I set about revamping my bunkers and entrenchments for WWII wargames. My last attempts were made in the first couple months after I started gaming, in my college apartment bedroom. I have a much better setup now, I'd like to think. So let me show you what I've made.
Here are some of my previous entrenchments in use. Up top, some scatter sandbags and below, an earthen rampart of sorts. These aren't bad, but not exactly what I wanted. The rampart, for example, is large enough to give convincing cover, but looks a little out of place on the table. There's some planks on the back side, but what's supposed to be holding all that dirt up in that shape? Anyway, I knew I could do better.
Bunkers
These are based on MDF/hardboard which is good and sturdy. Best to cut with a jigsaw. I built up some height with strips of foamcore board and built the structure of the bunker from twigs and cake pop sticks from the craft store. I used Vallejo texture paste mostly for the ground texture and then painted and applied static grass and Geek Gaming Scenics basing mix like I use on my Soviets. The sandbags on the command bunker are resin, from JTFM/Die Waffenkamer in Canada.
Bunkers
These designs are pretty shamelessly stolen from TinyHordes' Soviet MG Platoon, which is appropriate because that's the Chain of Command list I'll be using them for.
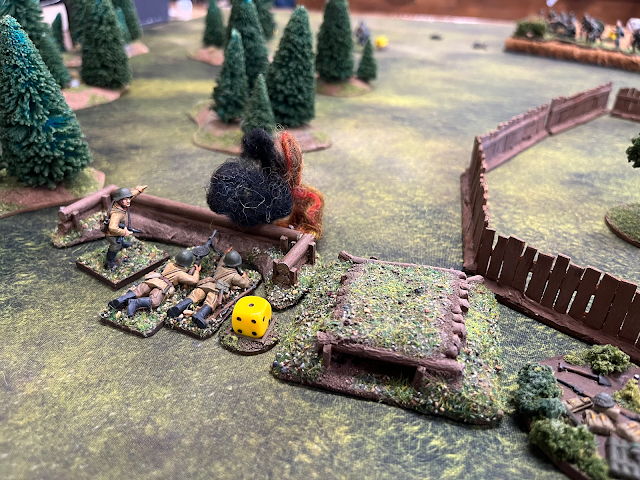
Three machine-gun bunkers and a command post bunker up front.These are based on MDF/hardboard which is good and sturdy. Best to cut with a jigsaw. I built up some height with strips of foamcore board and built the structure of the bunker from twigs and cake pop sticks from the craft store. I used Vallejo texture paste mostly for the ground texture and then painted and applied static grass and Geek Gaming Scenics basing mix like I use on my Soviets. The sandbags on the command bunker are resin, from JTFM/Die Waffenkamer in Canada.
I'm not totally sold on the rear entrances. I know Andy at TinyHordes has mentioned that they could be done better. They shouldn't be directly behind the firing port. But I got lazy and didn't overthink it.
Some Soviets for scale.
With any dug-in positions, you have to strike a balance between visible believability and realistic depth, since you can't make scatter terrain that goes down into the table. I would like to think I've reached a good compromise here. They are low profile on the table, but still offer some convincing cover. I elected to just do the front segment of trench, making them essentially just a wall or rampart, because it makes them more flexible for figures on bases.Log Entrenchments/BarricadesSome Soviets for scale.
Sandbag Entrenchments
Like the bunkers, these are based on MDF/hardboard and built up with foamcore board. The bulk of the sandbags are sculpted from DAS air-dry clay, with a few resin ones added to add some variation (and because I got tired of sculpting).
Added a crate and some shovels or two to give these a slightly lived-in feel.It seems to me that, especially on the eastern front, there were a good number of entrenchments that made heavy use of logs. It is convenient, then, that these are easy to put together with dowel sticks! Admittedly, if I had these to do again, I would make an attempt to add more bark texture. I didn't have twigs that seemed quite the right size, that would probably be the ideal balance of appearance and effort. The little stakes holding the logs up are small square craft sticks, essentially matchsticks.
It might have been nice to add a little axe to these, but I didn't have any to hand.Some Soviets for scale, of course.


Comments
Post a Comment